

If Windows says a file or disk is write-protected, deletion is blocked until the read-only rule is removed. The protection may apply only to one file, or it may apply to the entire USB flash drive, SD card, external disk, or partition.
Use these steps only on files and storage devices you own or administer. Back up important data first, identify whether the restriction is file-level or device-level, and never select a disk by guesswork in DiskPart.
First, Identify What Is Write-Protected
Test a small, nonessential file on the same storage device. The result tells you where to begin.
- Only one file is affected: check its Read-only attribute, permissions, and whether another program is using it.
- Every file on a USB drive or SD card is affected: check the physical lock switch and device-level read-only status.
- The device suddenly became read-only: back up readable data because failing flash storage can enter a protective read-only state.
- The computer is managed by an organization: contact the administrator before changing Registry or disk policy settings.
Method 1. Remove File Write Protection in Properties
Use this method when one file is marked read-only but other files on the same drive can still be edited or deleted.
- Right-click the affected file and choose Properties.
- On the General tab, clear Read-only.
- Select Apply, then OK.
- Close any application that has the file open and try deleting it again.
- If Windows reports access denied, check Security > Advanced and confirm your administrator account owns the file and has the required permission.
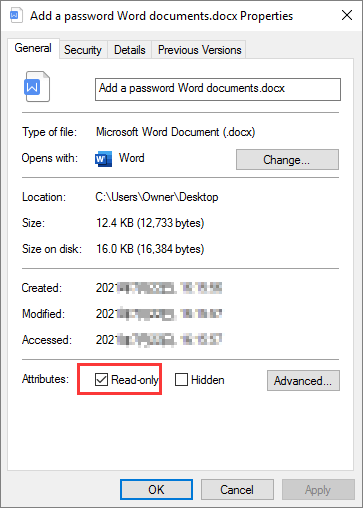 Clear the file-level Read-only attribute before retrying deletion.
Method 2. Clear Disk Read-Only Status with DiskPart
Use DiskPart when the whole removable drive or disk is read-only. Select the disk by capacity and device identity, not by assuming a disk number.
- Connect the USB drive, SD card, or external disk.
- Search for Command Prompt and choose Run as administrator.
- Enter diskpart, then enter list disk.
- Identify the correct disk by size. Enter select disk N, replacing N with the verified disk number.
- Enter attributes disk to inspect the current status.
- Enter attributes disk clear readonly.
- Enter exit, reconnect the drive, and test deletion with a nonessential file.
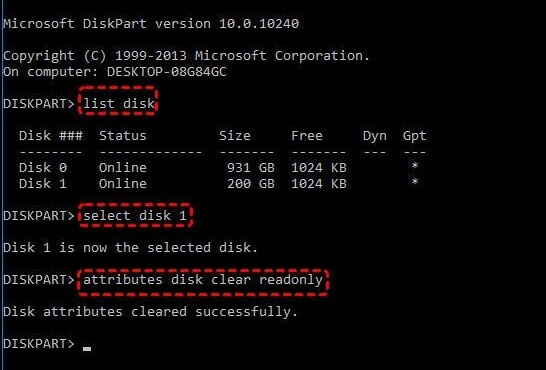 DiskPart can clear a software read-only attribute after the correct disk has been positively identified.
Method 3. Check the Windows WriteProtect Registry Policy
A Windows storage policy can block writes to removable media. Check this only after the physical switch and DiskPart status have been reviewed.
- Press Win + R, enter regedit, and open Registry Editor as an administrator.
- Go to HKEY_LOCAL_MACHINE\SYSTEM\CurrentControlSet\Control\StorageDevicePolicies.
- If an existing WriteProtect value is present, export the key as a backup.
- Open the value and change its data from 1 to 0.
- Restart Windows, reconnect the storage device, and test it again.
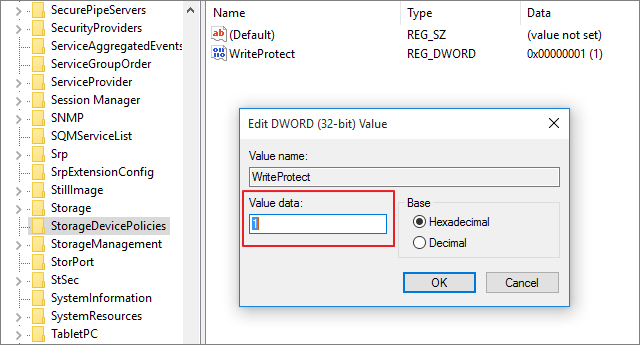 Set an existing removable-storage WriteProtect policy value to 0 only on a computer you administer.
Delete the File after Write Protection Is Removed
Once Windows allows the file to be changed, choose the deletion method that matches the data.
- Delete to Recycle Bin: use this when you may need to restore the file.
- Shift + Delete: bypasses the Recycle Bin but is not guaranteed secure erasure.
- File Shredder: use for confidential data that should be removed more securely after all protection rules have been removed.
If the file still cannot be deleted, restart Windows to release open handles, check ownership and permissions, and review drive health. A storage device that remains read-only on several computers may be failing.
Protect Files Intentionally with GiliSoft File Lock Pro
Accidental write protection is frustrating because the source is unclear. File Lock Pro provides an explicit way to lock or protect selected files, folders, local drives, external storage, and shared folders, then remove your own rule later with the master password.
Controlled protection with a clear unlock path
Use Locking File when access should require authorization, Protecting File when changes or deletion should be restricted, and File Shredder when confidential data should be securely removed.

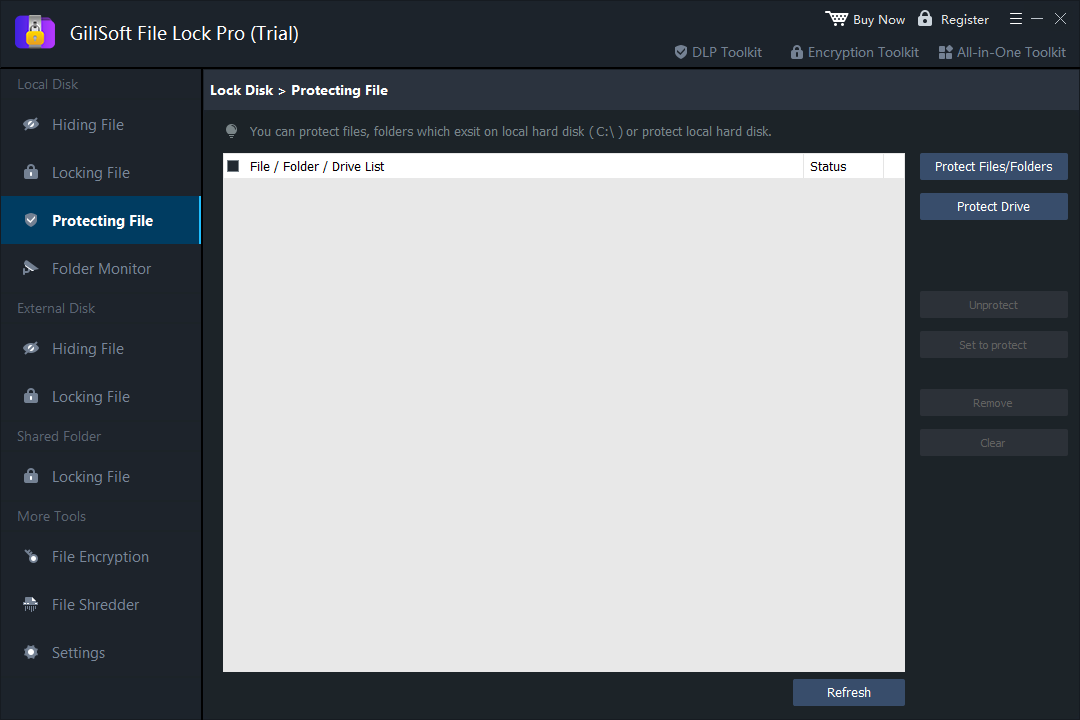 Apply and remove an authorized protection rule from one interface.
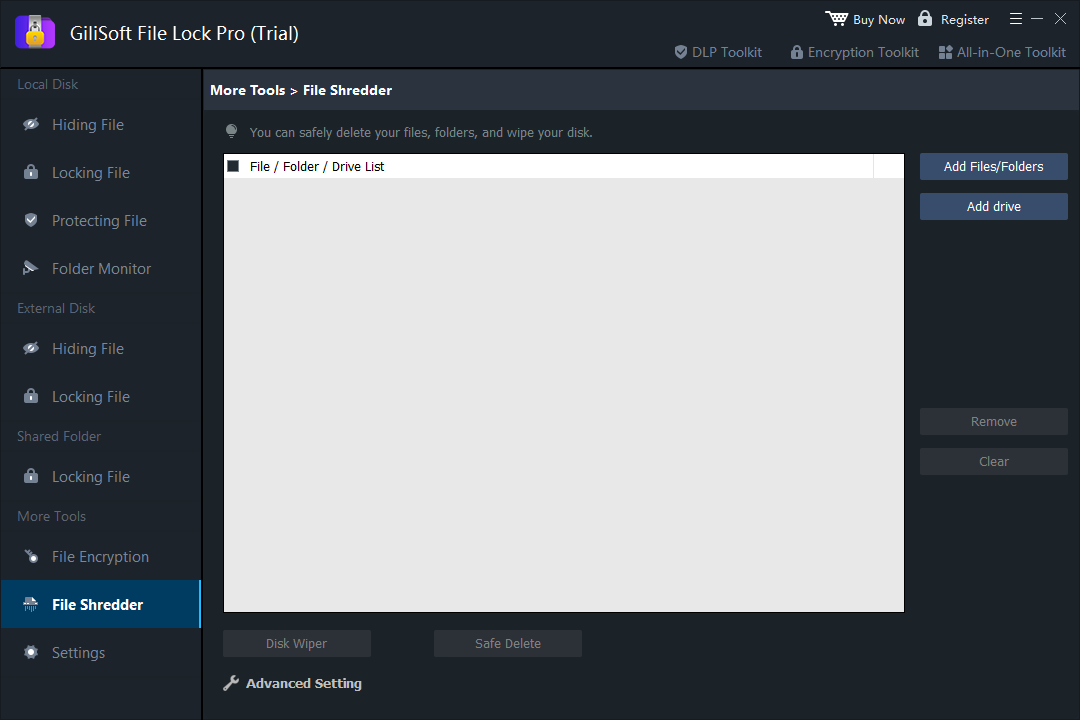 Securely shred selected files only after confirming they are no longer needed.
Write-Protected File Checklist
- Confirm whether one file or the entire storage device is affected.
- Check the physical lock switch before changing software settings.
- Back up readable data before using DiskPart or editing the Registry.
- Verify the disk number carefully before running a DiskPart command.
- Test the result with a nonessential file before deleting important data.
- Replace the device if it remains read-only across multiple computers and shows signs of failure.
Protect, Unlock, and Securely Remove Selected Files
Use GiliSoft File Lock Pro when you want clear, password-controlled protection instead of an unexplained read-only state.
Download File Lock Pro Trial