
Choose a Tool and Add Files
Open Common Conversion, HEIC Conversion, RAW Conversion, or a batch tool. Click Add Files or drag supported images into that workspace.

Turn phone photos, camera files, and image collections into ready-to-use files for websites, documents, and sharing. Convert image formats, resize batches, rename photos, compress files, and create PDF output on Windows.
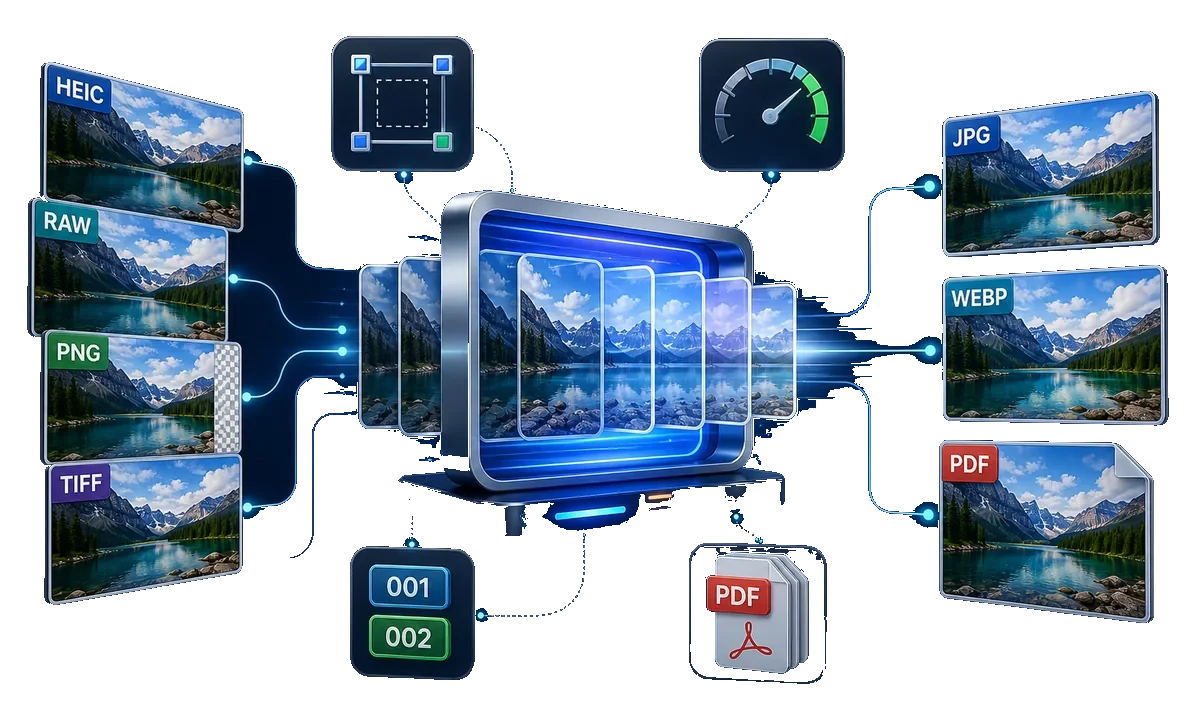

GiliSoft Image Converter prepares phone photos, camera files, product images, screenshots, and scanned pictures for everyday use. Convert common formats including JPG, PNG, WebP, BMP, GIF, and TIFF, or open the dedicated HEIC and RAW conversion tools to make phone and camera sources easier to share and use on Windows.
Make an image set consistent without adjusting every file by hand. Batch Resize provides custom width and height, Keep Aspect, Stretch Mode, and size presets. Batch Rename lets you set a name prefix, starting number, and interval, with the new names shown before processing. Separate tools handle cropping, rotation, compression, and classification.
Convert scans and pictures to PDF, split an image into smaller pieces, or merge images for a combined visual. The task launcher also offers Image to Scanned, an image editor, enhancement tools, and photo repair utilities when your project needs more than conversion.
Choose the task, add the images, set the available output options, and save to a new folder. Run additional batch tools as needed and review a sample before processing the full set. The Image Converter user guide shows the real workspaces and output checks. Download the free trial to evaluate the tools with your own images.

Use Common Conversion for JPG, PNG, WebP, BMP, GIF, TIFF, and other supported images. Add multiple files, choose the available output format, and prepare copies for sharing or publishing.
Open HEIC Conversion or RAW Conversion for supported phone and camera sources. Create JPG or PNG copies for review, uploads, design projects, and everyday Windows applications.
Enter a custom width and height or choose a size preset in Batch Resize. Use Keep Aspect to retain proportions, compare the preview, and apply the settings to the intended set.
Use Image Compression to prepare lighter copies for websites, email, documents, and storage. Compare fine detail and file size on a sample before processing the full collection.
Open Image To PDF and convert supported pictures, scans, and screenshots to PDF output. Choose an output folder and review the finished files before sending or printing them.
Use Batch Crop to reframe an image set or Batch Rotation to correct orientation. Review the subject and boundaries when the source images have different sizes or compositions.
Set Name Prefix, Start Num, and Intervals Num in Batch Rename. Check the New Name column before creating a consistently named catalog, project folder, or image archive.
Choose Split Image to divide one picture into smaller pieces, or Merge Images to combine selected pictures into one visual. Prepare the layout in the dedicated tool.
Open Batch Classification to group an image set using the options provided by the tool. Keep a separate working copy when preparing a large photo collection.
Choose Image to Scanned when a picture needs a scan-style visual treatment. Preview the result for documents, project materials, and presentation images.

Batch conversion saved us manual time when processing product image folders.
HEIC to JPG conversion is stable, and upload compatibility issues are much easier to avoid.
RAW conversion quality is reliable for moving camera files into our design process.
Compression settings helped us reduce web image size while keeping visual quality acceptable.
Explore the tool launcher and dedicated workspaces for format conversion, batch resizing, numbered file names, image-to-PDF conversion, and additional image utilities.
Choose Format Conversion, RAW Conversion, HEIC Conversion, batch tools, Image to PDF, Split Image, or Merge Images from the launcher.
Choose the task you need, add the image set, and review a finished sample before processing the rest.
Open Common Conversion, HEIC Conversion, RAW Conversion, or a batch tool. Click Add Files or drag supported images into that workspace.
Choose the target format in conversion, dimensions in Batch Resize, or a name sequence in Batch Rename. Set a separate output folder.
Click Convert, open a saved sample, and check its appearance, dimensions, file size, and name. Continue with another batch tool if the project needs more preparation.
Prepare phone and camera pictures for sharing, email, and applications that expect JPG. Balance compression and dimensions against visible detail.
Use PNG for screenshots, sharp text, and images that need a transparent background. A format change alone does not cut out an existing background.
Choose WebP when the destination website or publishing system accepts it. Review the saved image and file size rather than assuming every conversion will be smaller.
Prepare a consistent catalog with the conversion, resize, crop, and rename tools. Use Keep Aspect for product proportions and a clear file-name sequence for your listings.
Use HEIC Conversion for phone photos and RAW Conversion for supported camera files. Create JPG or PNG copies for customers, colleagues, design applications, and photo sharing.
Create lighter delivery copies for article images, support screenshots, campaign assets, and documentation while retaining the original files.
Use Image To PDF for supported scans, screenshots, visual records, and review proofs. Inspect readability and orientation in the resulting PDFs before sending or printing.
Open Image Edit for the image editor, Resize Image, Crop Image, Rotate Image, and Rename Image. Prepare an individual picture before creating the delivery copy.
Explore Image Beauty tools for face repair, sky replacement, colorization, image enhancement, watermarks, and image matting from the same task launcher.
Choose Old Photo Repair to improve a faded image, or Fix Corrupted Image when a damaged file needs repair. These are separate tools in the Image Repair category.
Open the recovery utility when images were deleted or lost. Recovery is a separate task from converting healthy source files.
GiliSoft Image Converter provides a free trial, with paid licenses available for the full product. Try representative source files and the tools you need before choosing a license. Check the trial and activation screens for the restrictions that apply to the installed build.
Yes. Use HEIC Conversion or RAW Conversion for supported phone and camera sources, then choose an available output such as JPG or PNG. JPG is useful for everyday photo sharing; PNG is useful for lossless image output. Test a sample from the phone or camera that produced the files before converting the full set.
Yes. Use Add Files or drag multiple supported images into the selected workspace. Format conversion, resizing, cropping, rotation, renaming, compression, and classification have dedicated tools. Run the required tasks in sequence when the same image set needs more than one type of preparation.
Open Batch Resize, add the photos, and choose Keep Aspect rather than Stretch Mode when the original proportions should remain unchanged. Review the output width and height, use Apply To All for the intended image set, choose an output folder, and inspect the converted results.
Yes. Open Batch Rename and add the image set. Set Name Prefix, Start Num, and Intervals Num, then review the New Name column before running the task. Use a separate output folder so the original names and files remain available.
The result depends on the output format, compression settings, and dimensions. JPG uses lossy compression, while PNG supports lossless image storage. Smaller dimensions remove image detail, and converting a low-quality source cannot recreate missing detail. Save a test copy and compare text, edges, gradients, colors, and file size at full view.
Yes. Open Image To PDF, add supported images such as JPG or PNG, choose the output folder, and run the conversion. Open the resulting PDF output to check the image orientation, readability, and dimensions before sending or printing it.
Choose an output that supports transparency, such as PNG, and inspect the saved file in the application where it will be used. JPG does not support transparent backgrounds. Converting a JPG to PNG changes its file format but does not automatically remove the existing background.
Continue with the illustrated workflow for the image task you need.

Choose common, HEIC, or RAW conversion for the source images you work with, and prepare usable copies for sharing, websites, documents, and design projects.
Use dedicated batch tools to standardize dimensions, correct orientation, create numbered names, and reduce file size. Preview the result and continue with the next task as needed.

Convert and prepare supported files on the Windows PC instead of uploading routine customer, product, or internal images to an online converter.
Convert image formats, prepare consistent dimensions and file names, reduce file size, and turn pictures into PDF output.


Enter your email address to get our latest newsletter