
How to Password Protect a CD or DVD
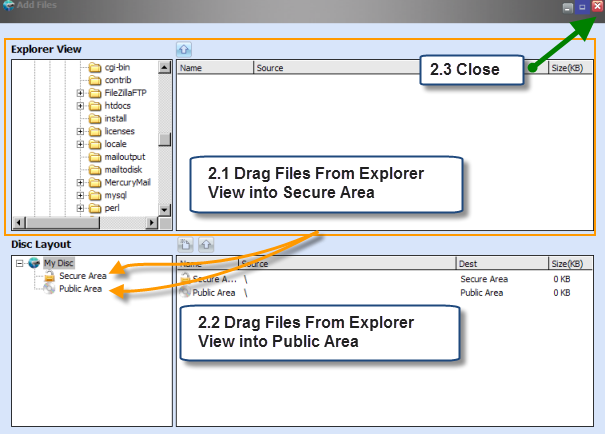
A password belongs to the encrypted content area, not to the disc tray or ordinary files placed in an open area. Plan the layout around what the recipient should be able to read before unlocking.
Quick answer
Add private files to the secure area in GiliSoft Secure Disc Creator, set the password when creating the disc or ISO, and verify that the included agent opens the protected area only after the correct password.
Choose the Right Disc Workflow
Choose a mixed public/secure disc if recipients need instructions before unlocking. If everything is confidential, keep the public area minimal and inspect it for accidental copies.
| Output | Best use | Validation |
|---|---|---|
| Protected CD or DVD | Physical offline handoff | Reinsert and read-test on a recipient-like PC |
| Encrypted ISO image | Review, archive, or later burning | Mount and test public and secure areas |
| Approved ISO burned to disc | Repeatable copies of one reviewed release | Test the actual burned media as well as the ISO |
Password access: Step-by-Step
- Separate open and private files
Check filenames, metadata, and document contents. Put only safe instructions in the public area and every protected file in the secure area.
- Create the protected project
Select the optical burner or Make ISO Image File, then add the approved files in GiliSoft Secure Disc Creator.
- Set and distribute the password
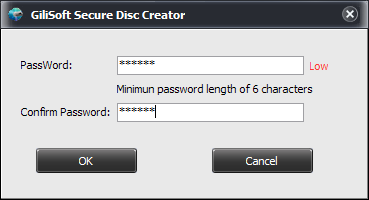
Enter and confirm a strong password for the secure area. Send it through an independent channel and keep a controlled recovery record.
- Test correct and incorrect access
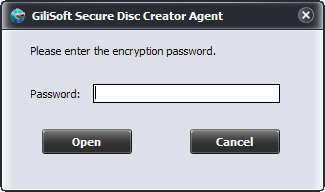
Open the completed disc or mounted image. Confirm public files remain readable, the secure area rejects an incorrect password, and the correct password opens the intended files.
See the full Secure Disc Creator user guide for the product's controls and the complete disc or ISO workflow.
GiliSoft Secure Disc Creator Interface
These product screenshots show the actual file-area, password, burn, image, or recipient controls used in this workflow.
Verify Before Distribution
- Confirm the final file list, version, and media capacity.
- Open public files without a password and protected files only after entering it.
- Test the intended Windows computer, optical drive, and recipient instructions.
- Record the publisher copy and give the password through a separate channel.
Frequently Asked Questions
Is the entire disc hidden until I enter a password?
No. The product supports a public area that remains open and a password-protected secure area.
Can I print the password on the disc sleeve?
That defeats the separation. Share the password over a different channel and verify the recipient before disclosure.