

Windows lets you create folders in seconds, but it does not provide a universal “set folder password” command for every edition. To protect confidential documents, photos, project files, or family records, you must choose between dedicated folder-locking software, Windows account encryption, an encrypted archive, or a simpler concealment method.
This guide first shows how to create and organize the folder, then compares five ways to protect it. GiliSoft File Lock Pro is the easiest option when an active folder should stay in its current location and require password-controlled access.
Before Protection: Create and Organize the Folder
Start with one clearly named folder. Keeping the files together makes every method below easier to apply and verify.
- Open the location where the protected folder should be stored.
- Right-click an empty area and choose New > Folder.
- Give the folder a clear name that does not reveal sensitive information.
- Move or copy the files you want to protect into the new folder.
- Open several files to confirm the move completed successfully before applying protection.
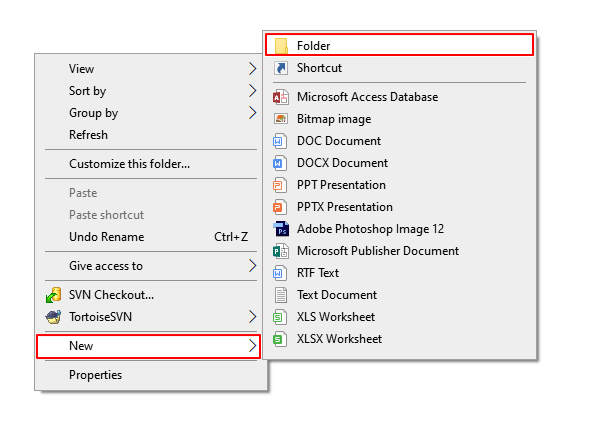 Create a new folder in the chosen Windows location.
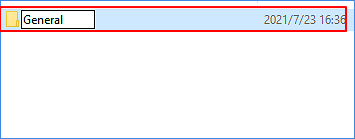 Use a recognizable but privacy-conscious folder name.
Method 1. Create a Password Protected Folder with GiliSoft File Lock Pro
File Lock Pro is the most direct method in this guide. The folder stays where it is, remains easy to manage inside the application, and can be locked, hidden, or protected according to the job.
Best for active folders
Use it for personal photos, client documents, tax records, HR files, project folders, USB folders, external storage, or LAN shared folders that are opened and updated regularly.

- Install File Lock Pro from the official GiliSoft download and create the master password.
- Open Local Disk and select Locking File.
- Click Lock Files/Folders and choose the folder you prepared.
- Apply the lock and verify that the folder cannot be opened without authorization.
- Use Hiding File instead when the folder should disappear from ordinary browsing.
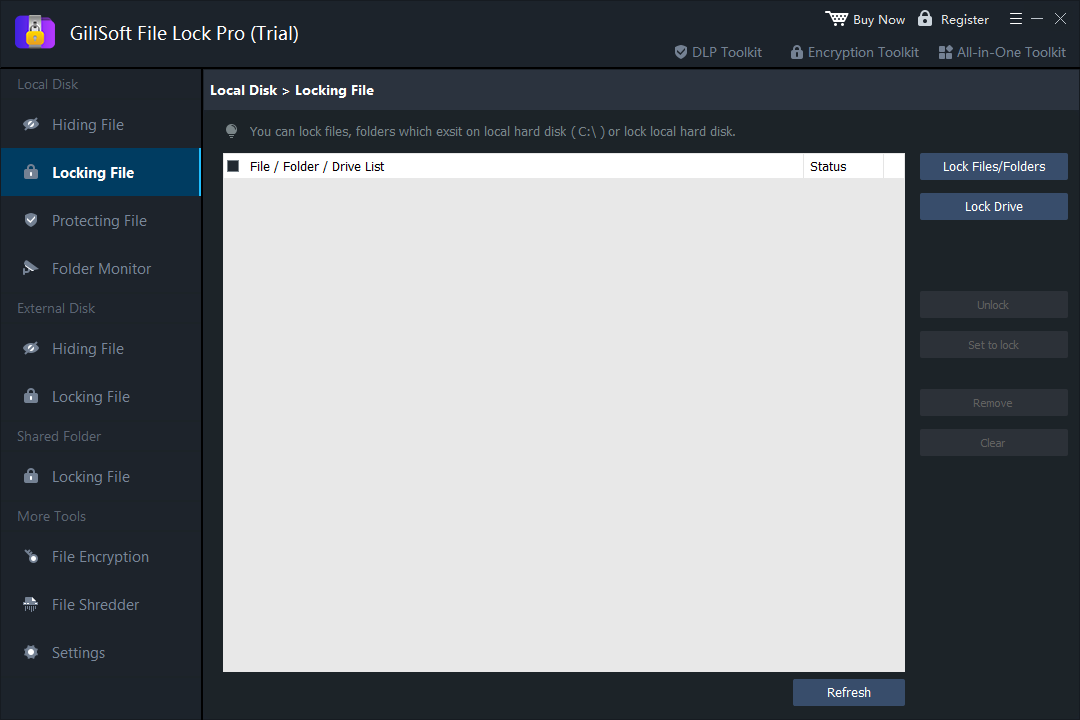 Add the selected folder and apply password-controlled locking without compressing it.
Method 2. Encrypt a Folder with Windows EFS
Encrypted File System (EFS) is built into supported Windows editions. It encrypts files for the current Windows account, but it does not create an independent password prompt for the folder.
- Right-click the folder and choose Properties.
- Select Advanced on the General tab.
- Enable Encrypt contents to secure data.
- Apply the change to the folder, subfolders, and files.
- Back up the EFS certificate and recovery key when Windows prompts you.
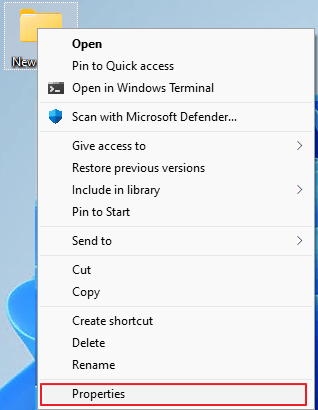 Open Advanced Attributes from the folder properties.
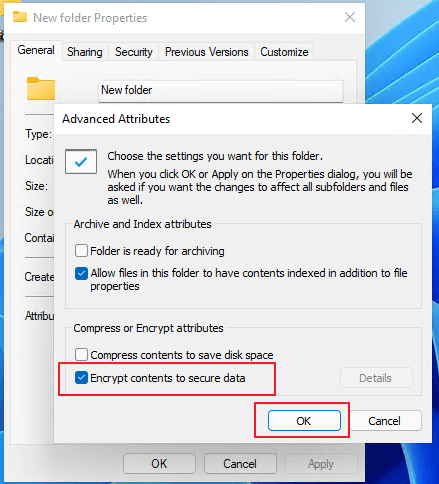 Enable EFS encryption and apply it to the folder contents.
Method 3. Add a Folder to Folder Lock
Folder Lock uses an encrypted locker or protected storage approach. It can suit users who prefer moving sensitive files into a dedicated secure location rather than locking the existing folder in place.
- Open Folder Lock and create the required account or master password.
- Create or open a secure locker.
- Add the prepared folder or move its files into the protected location.
- Close the locker and test access before deleting any original copies.
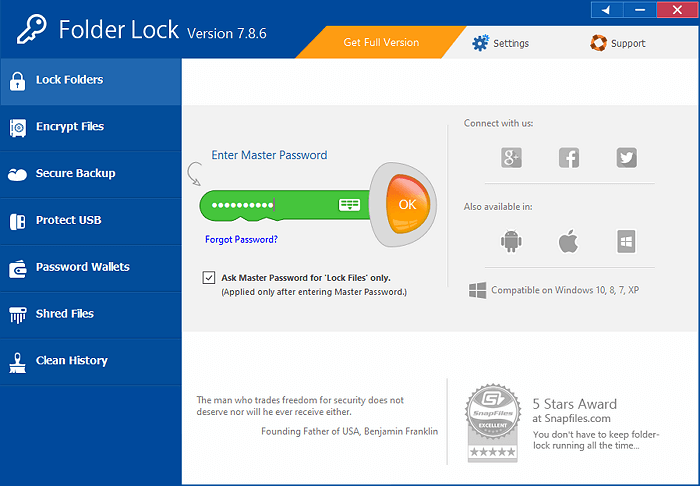 Open the locker-oriented protection interface.
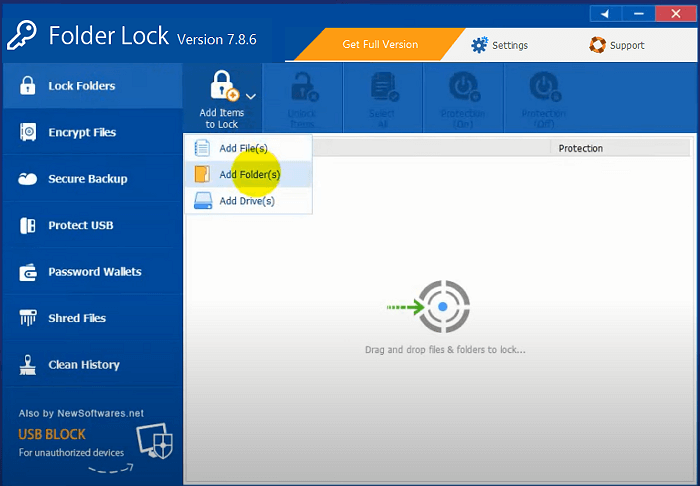 Add the folder or its contents to the protected location.
Method 4. Create a Password-Protected Archive with 7-Zip
7-Zip is a practical free option for creating an encrypted archive copy. It is best for sending or storing a folder, not for a folder that changes throughout the day.
- Install 7-Zip from its official source.
- Right-click the folder and choose 7-Zip > Add to archive.
- Select 7z or ZIP as the archive format.
- Enter and confirm a strong password.
- Enable file-name encryption when supported, then create and test the archive.
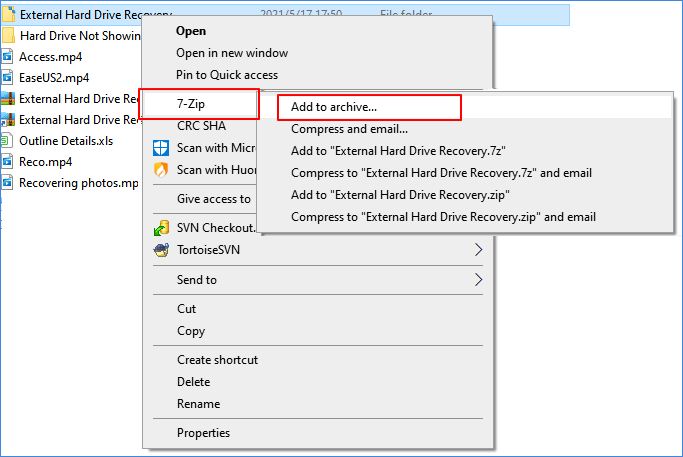 Create an archive from the selected folder.
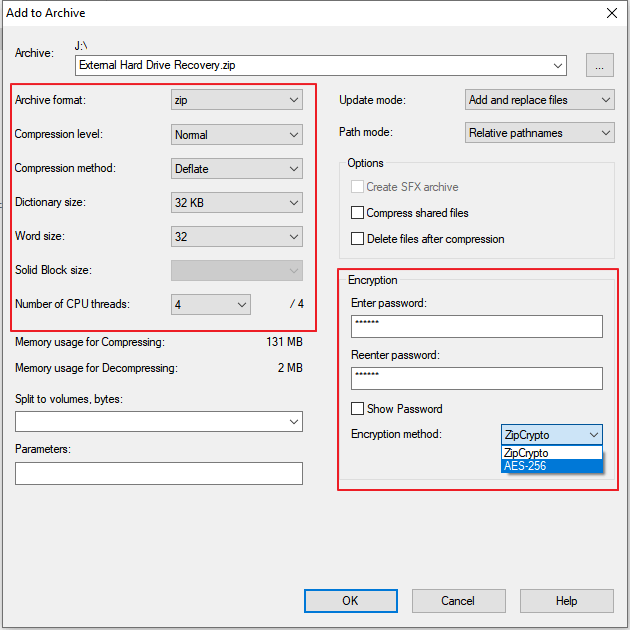 Choose the encryption settings and enter the archive password.
Method 5. Use a Batch File to Conceal a Folder
A batch-file locker is frequently described online as folder password protection, but it is not strong encryption. The script usually renames or hides a folder and compares typed text with a password stored inside the script.
- Create a text file in the same location as the folder.
- Add the folder-locking batch commands and replace the sample password.
- Save the file with a .bat extension.
- Run it to create or conceal the designated folder.
- Run it again and enter the configured text to restore visibility.
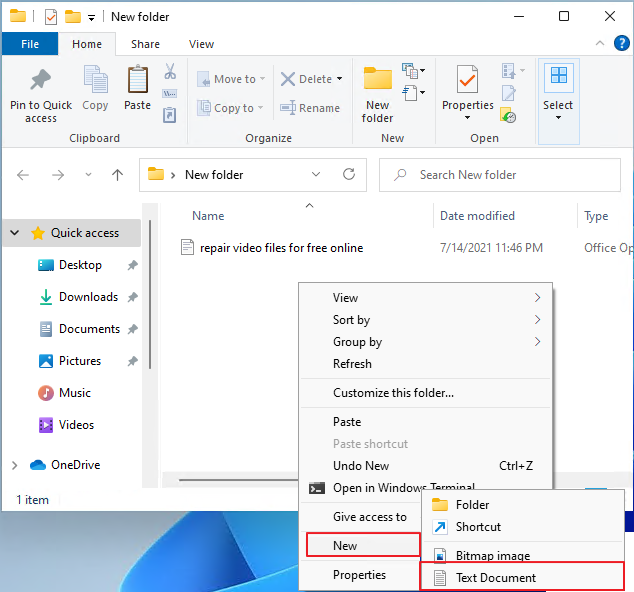 A batch script can automate folder renaming and hidden attributes.
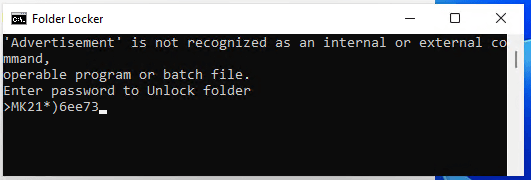 The script compares typed text with the value stored in the batch file.
Which Password Protected Folder Method Is Best?
| Method | Best use | Real encryption | Daily convenience |
|---|---|---|---|
| GiliSoft File Lock Pro | Active local, USB, external, and shared folders | Includes separate portable encryption tools | High |
| Windows EFS | Account-tied protection on supported editions | Yes | Medium |
| Folder Lock | Encrypted locker or vault storage | Yes, by feature | Medium |
| 7-Zip | Protected archive copies | Yes | Low for active folders |
| Batch file | Basic concealment experiments | No | Low |
Final Checks Before You Rely on the Protected Folder
- Test access after restarting Windows.
- Keep the master password or recovery information in a safe place.
- Back up EFS certificates before changing accounts or reinstalling Windows.
- Verify encrypted archives before deleting original files.
- Use secure deletion when an unprotected original copy should not remain recoverable.
Create a Password Protected Folder without Repacking It
Use GiliSoft File Lock Pro to lock or hide active folders on local disks, USB storage, external drives, and shared Windows locations.
Download the Official Trial