
How to Join AVI Files on Windows Without Gaps
AVI is a container, so two .avi files can use different video codecs, audio formats, frame rates, resolutions, or aspect ratios. A reliable join starts by checking those properties, arranging clips in order, cleaning each boundary, and exporting one consistent file.
Quick answer
Add the authorized AVI files to GiliSoft Video Editor, arrange them in playback order, trim unwanted frames at each boundary, and preview the video and audio transitions. If the clips do not share compatible codecs, resolution, frame rate, and audio properties, export them using one common output profile.
Choose the Right AVI Joining Method
| Source and goal | Recommended method | What to check |
|---|---|---|
| Matching AVI clips that only need ordering | Use the focused Joiner tool | Clip order, duration, and every join point |
| Different resolution, frame rate, or codecs | Export one normalized output | Framing, motion, quality, and audio sync |
| Boundaries need trimming or transitions | Use the Video Studio timeline | No repeated frames, abrupt cuts, or unwanted gaps |
| Only selected parts should be combined | Trim each clip before joining | Correct in and out points and final duration |
How to Join AVI Files Step by Step
- Inspect every AVI source
Keep the originals unchanged. Play each file and compare resolution, aspect ratio, frame rate, interlacing, video codec, audio format, and synchronization.
- Open the dedicated Video/Audio Joiner
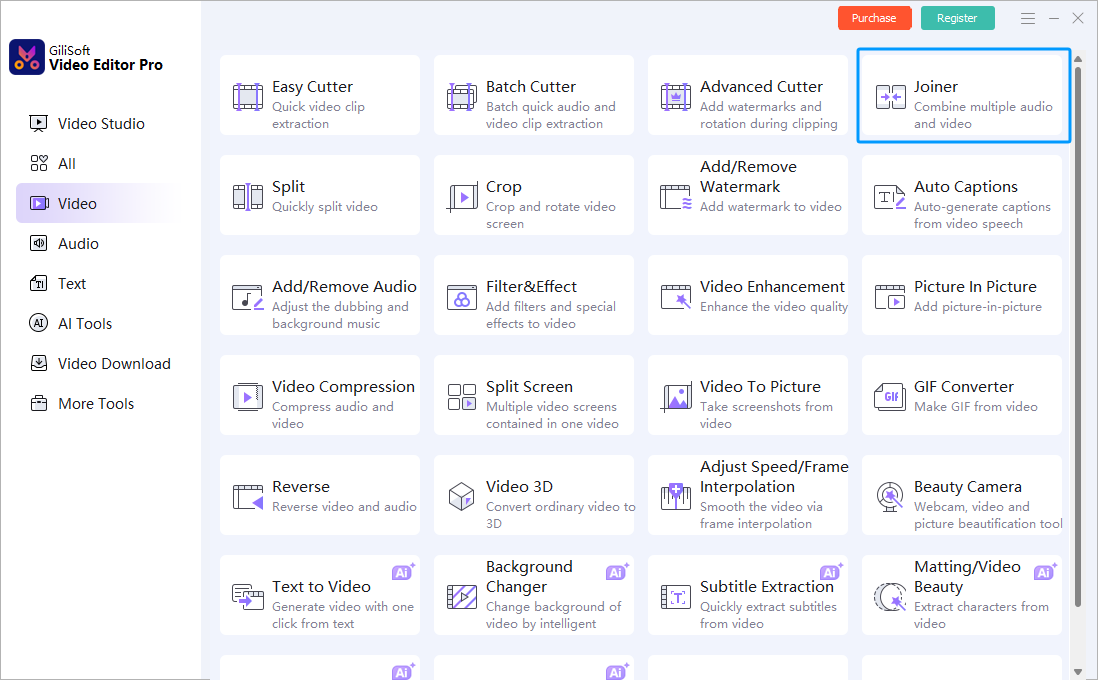
In GiliSoft Video Editor Pro, open Video and select Joiner. This focused tool is the recommended workflow for combining AVI files; use Video Studio only when the project needs layered titles, overlays, or broader timeline editing.
- Add and arrange the AVI clips
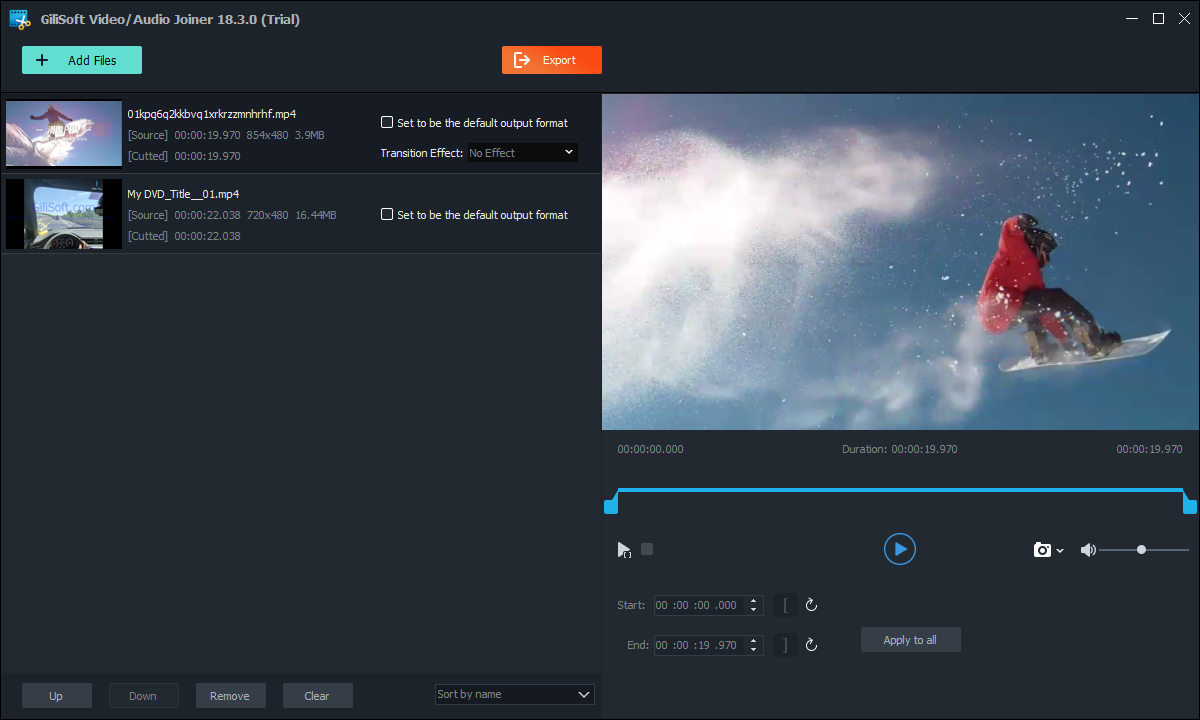
Select Add Files, then use the Up and Down controls to set the exact playback order. Review the source duration and dimensions shown for every clip.
- Trim and preview every join point
Use the Start and End controls to remove repeated frames, black frames, silence, or unwanted tails. Apply a transition only when it improves the cut, then preview several seconds around every boundary with sound enabled.
- Choose one output profile
When sources differ, select one resolution, frame rate, aspect ratio, video codec, and audio configuration appropriate for the destination.
- Export and verify the joined video
Create a separate output file, then check the beginning, every join, the ending, total duration, audio sync, and playback outside GiliSoft Video Editor.
Use the Dedicated Video/Audio Joiner
The recommended AVI workflow is the focused Joiner inside GiliSoft Video Editor Pro. It keeps file order, clip trimming, transition selection, preview, and export in one task-specific workspace.
Use Video Studio Only for Complex Multitrack Editing
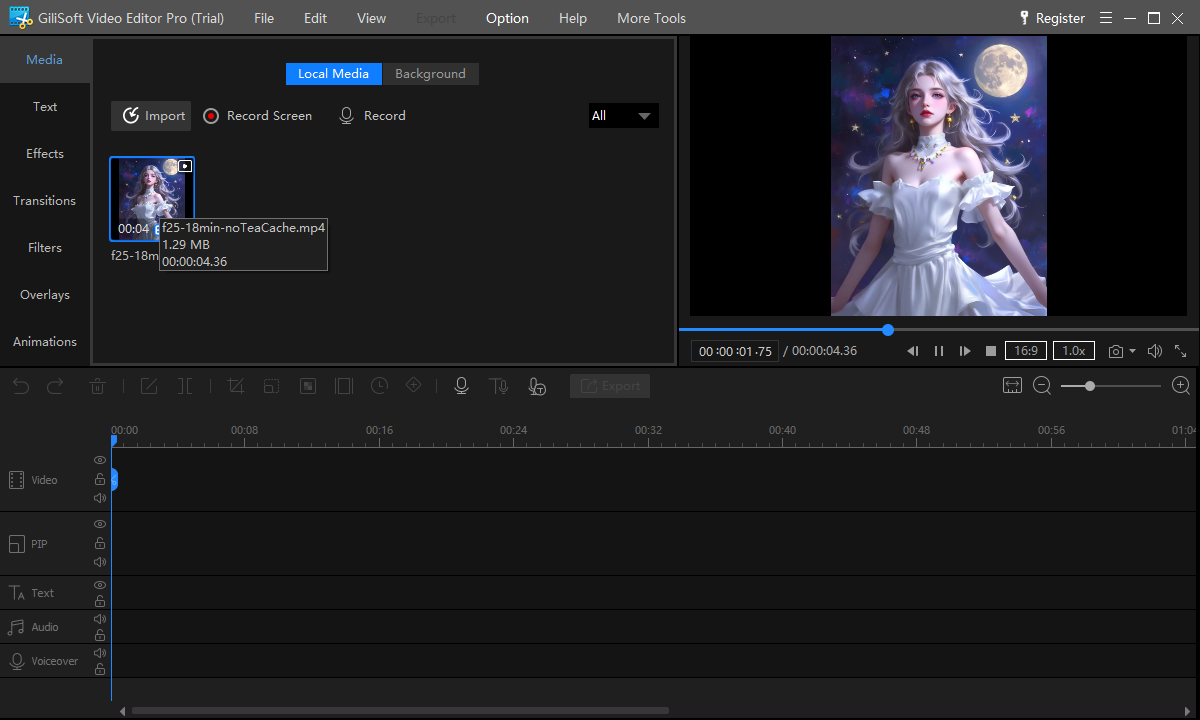
Video Studio is the secondary option, not the default AVI joining workflow. Move to the full timeline only when the finished video needs editing that the dedicated Joiner is not designed to handle.
- Layered text or subtitles: place titles, captions, or labels at precise positions and times.
- Picture-in-picture or overlays: combine several visual layers instead of playing clips one after another.
- Multiple audio tracks: mix narration, background music, and source audio independently.
- Complex effects and transitions: use keyframes, filters, color adjustments, or effects across several tracks.
- A broader editing project: combine joining with cropping, speed changes, visual composition, and detailed timeline work.
For a straightforward AVI merge, return to Video > Joiner. It keeps the file list, order controls, clip trimming, transitions, preview, and export together without the extra complexity of a multitrack timeline.
Protect Timing, Quality, and Audio at Every Join
- Keep the authorized original unchanged and export a separate edited copy.
- Review every edit boundary with sound and picture rather than relying only on the timeline markers.
- Match output format, resolution, frame rate, channels, and captions to the actual destination.
Match the Output to the Source and Destination
| Resolution and aspect ratio | Choose one frame size and framing rule. Preview borders, stretching, or cropping when sources differ. |
|---|---|
| Frame rate | Use a consistent output rate and inspect motion carefully when mixing constant and variable frame rate clips. |
| Video codec | Keep AVI only when the recipient needs it. For broader modern playback, consider an appropriate MP4 profile. |
| Audio | Use one sample rate, channel layout, and codec. Listen around each boundary for gaps, clicks, or level jumps. |
| Quality and size | Avoid repeatedly re-encoding the same source. Export once from the preserved originals at settings suited to the final destination. |
Frequently Asked Questions
Can different formats be joined directly?
A direct join usually needs matching streams. A timeline can combine different sources by decoding and exporting them into one consistent output.
Why is there a gap or click at a join?
The clips may contain silence, mismatched timestamps, or hard audio boundaries. Trim and preview the join, then use a short fade when appropriate.
Should every clip use the same frame rate?
A consistent project and output frame rate is normally safer. Review motion when sources differ.
Can AVI files be joined without re-encoding?
Sometimes. A direct join normally requires compatible video and audio streams, including closely matching codecs, resolution, frame rate, and other properties. Different sources usually need a new encoded output.
How should I verify a long joined file?
Check every join point as well as the beginning, middle, ending, duration, audio sync, and final file size.