
WMV Cutter for Windows: Cut and Trim WMV Files
WMV normally stores Windows Media Video and WMA audio inside the ASF container family. Reliable cutting depends on keyframes, timestamps, index health, codec version, dimensions, frame rate, aspect ratio, and audio timing rather than the .wmv extension alone.
Quick answer
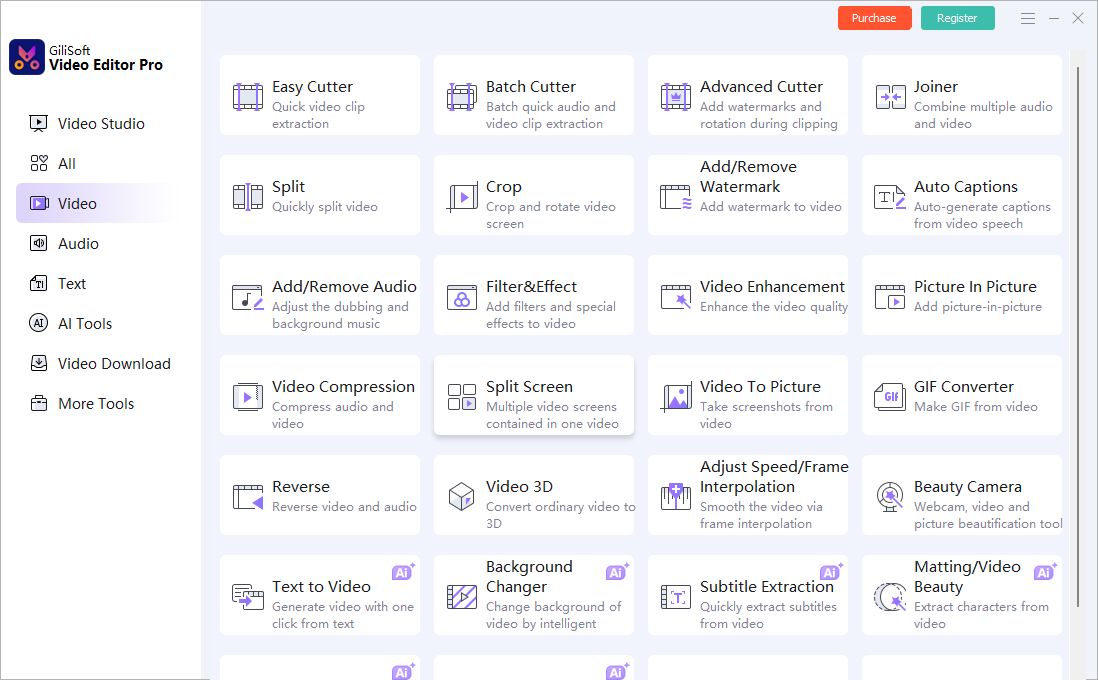
Open Easy Cutter in GiliSoft Video Editor Pro, add the WMV file, mark the range to keep, preview picture and WMA audio at both boundaries, and export a separate result. Use Batch Cutter for several files and Video Studio only for complex multitrack work.
Choose the right WMV cutting workflow
| Goal | Recommended tool | Why it fits |
|---|---|---|
| Extract one or more scenes from one WMV file | Easy Cutter | Focused range selection without a full project |
| Cut several independent WMV files | Batch Cutter | Repeats the workflow across multiple sources |
| Cut plus crop, watermark, or rotate | Advanced Cutter | Combines clip extraction with visual adjustments |
| Add transitions, titles, overlays, or separate audio | Video Studio | Provides a timeline for complex multitrack editing |
How to cut a WMV file on Windows
-
Keep the source and inspect playback
Play the WMV from beginning to end. Check seeking, dimensions, aspect ratio, frame rate, Windows Media codec generation, WMA audio, duration, and whether the source already drifts out of sync.
-
Open the focused cutter
Choose Easy Cutter for one file, Batch Cutter for several independent files, or Advanced Cutter when the clip also needs cropping, rotation, or a watermark.
-
Add the WMV file and mark the scene
Set the beginning and ending around complete action and dialogue. Note that an exact selected frame may fall between compressed-video keyframes.
-
Preview picture and WMA audio
Review several seconds around both cut points. Check for a frozen first frame, missing action, black frames, audio clicks, timestamp jumps, and sync drift.
-
Choose an output for the destination
Keep WMV when a Windows Media workflow requires it. Create a compatible MP4 copy only when the receiving browser, phone, TV, or application does not support the source codecs.
-
Verify the exported clip
Open the result outside the editor and check both boundaries, seeking, duration, aspect ratio, motion, WMA audio sync, and playback on the actual destination.
Preserve WMV timing, picture, and audio
- Keep the source. Export a separate clip so an index, timestamp, codec, or quality problem remains reversible.
- Respect aspect ratio. Preserve the intended picture shape rather than stretching older 4:3 footage to fill a widescreen frame.
- Check audio throughout. WMA sync may look correct at the first boundary but drift later in a long clip.
- Choose the destination first. Retain WMV for a compatible Windows workflow or create a modern delivery copy when required.
Understand keyframes, ASF timestamps, and re-encoding
A fast WMV cut can be limited to nearby keyframes. Exact boundaries normally require decoding and re-encoding around the selected point, while visual changes and format conversion require a new encoded file.
ASF timestamps or indexes can also be damaged or discontinuous. Test seeking and audio sync across the exported result instead of checking only the first and last frame.
Fix common WMV cutting problems
The cut begins early, late, or with a frozen frame
The selected point may fall between keyframes. Use a frame-accurate export or move the boundary to a nearby natural scene change.
WMA audio drifts out of sync
Check the source for timestamp or index problems, then export a short test that includes the difficult boundary. Verify sync near the beginning, middle, and end.
The picture looks stretched
Preserve the source aspect ratio and choose a deliberate fit, crop, or border policy instead of forcing every source to fill the output frame.
The result works on Windows but not another device
The destination may not support the Windows Media video or audio codec inside the file. Create a compatible delivery copy only after confirming the required format.
Frequently Asked Questions
How do I cut a WMV file on Windows?
Open Easy Cutter in GiliSoft Video Editor Pro, add the WMV file, mark the range to keep, preview picture and audio at both boundaries, and export a separate result.
Can I cut WMV without losing quality?
A compatible keyframe-aligned cut may avoid full re-encoding. Exact boundaries, visual changes, or format conversion require a new encode.
Why does a WMV cut start earlier or later than selected?
Compressed WMV video seeks around keyframes. Use a frame-accurate export or move the boundary to a nearby natural scene change.
Why is WMA audio out of sync after cutting WMV?
ASF timestamps, damaged indexes, variable source timing, or an incomplete boundary can cause drift. Preview a short test and verify sync throughout the exported clip.
Should I convert WMV to MP4 before cutting?
Not automatically. Cut the source when it opens correctly, and create an MP4 delivery copy only when the destination does not support its Windows Media codecs.