
WMV Joiner for Windows: Merge WMV Files in Order
WMV files can use different Windows Media codec versions, dimensions, frame rates, aspect ratios, audio formats, and timestamp structures. A reliable join keeps the intended order, avoids gaps or repeated frames, and creates one output profile that the destination can play consistently.
Quick answer
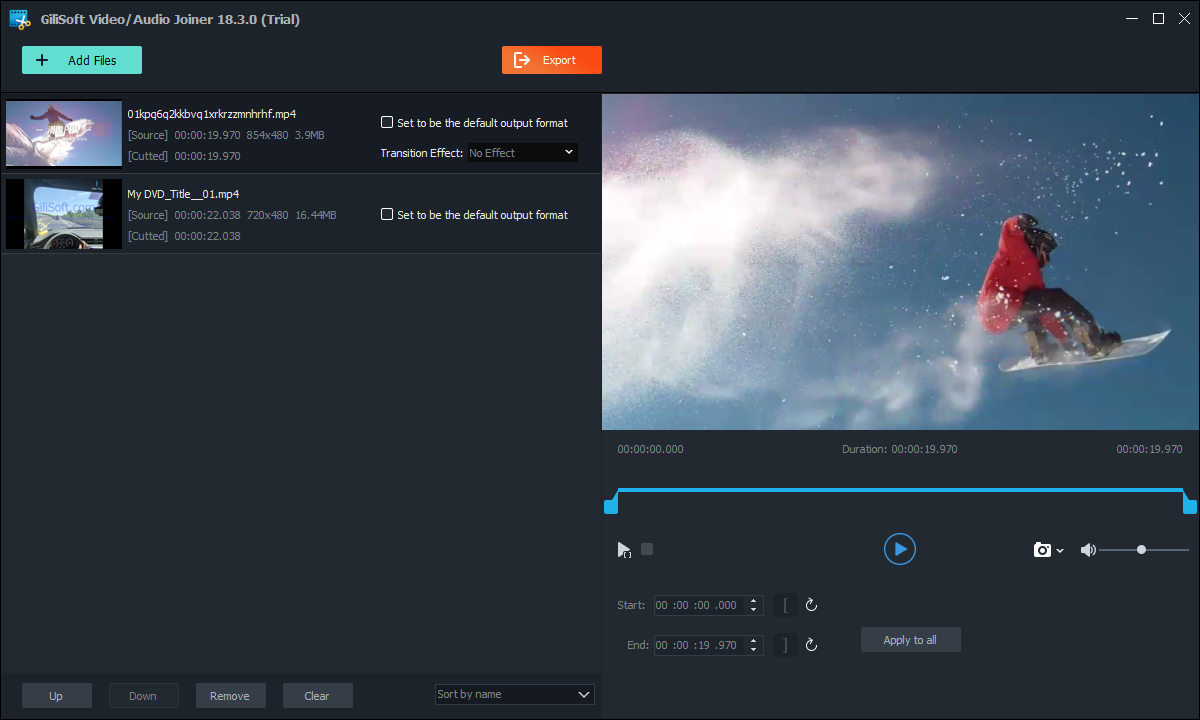
Open Joiner in GiliSoft Video Editor Pro, add the WMV files, arrange them in order, preview each boundary, and export one combined file. Use Video Studio only when the project needs transitions, titles, overlays, separate audio, or complex timing.
Choose the right WMV joining workflow
| Goal | Recommended tool | Why it fits |
|---|---|---|
| Combine WMV clips in sequence | Joiner | Focused ordering, boundary preview, and one combined export |
| Sources use different video or audio settings | Joiner with one output profile | Normalizes the files into a consistent deliverable |
| Add transitions, titles, overlays, or separate audio | Video Studio | Provides a multitrack timeline for a more complex edit |
How to merge WMV files on Windows
-
Keep the source files and inspect them
Play every WMV clip before editing. Note its dimensions, frame rate, aspect ratio, audio level, duration, and whether seeking near the beginning or end behaves correctly.
-
Open the dedicated Joiner
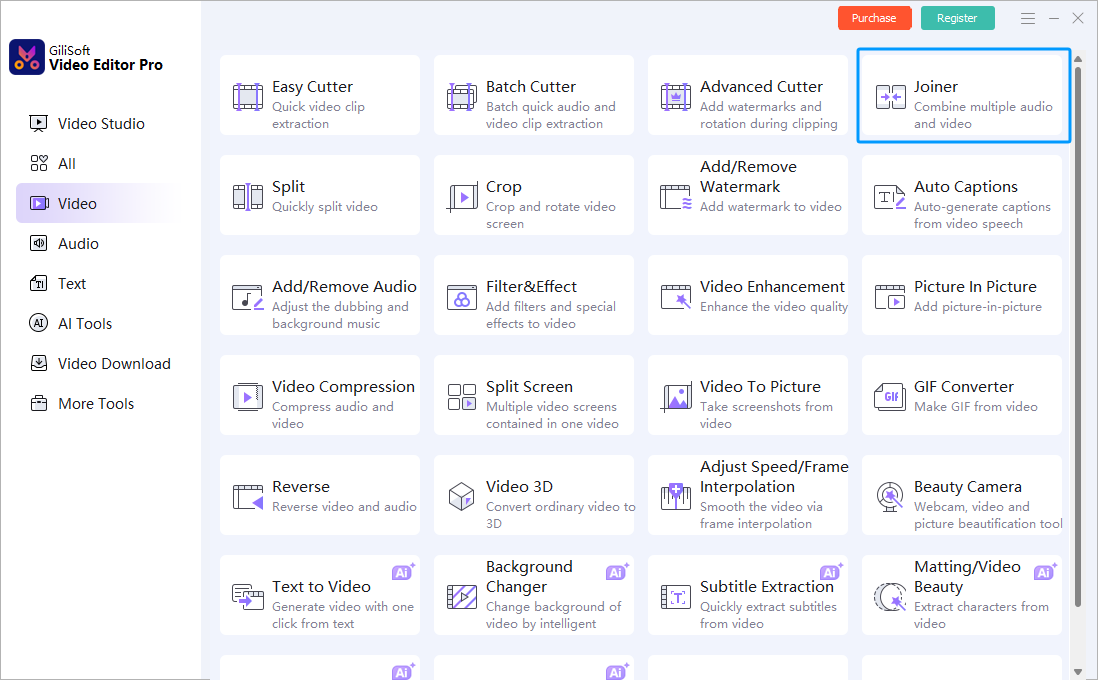
Choose Joiner from the Video tools in GiliSoft Video Editor Pro. This is the direct workflow for combining clips; Video Studio remains available when the project develops into a multitrack edit.
-
Add the WMV files and set their order
Import the clips, then move them up or down until the list matches the intended sequence. Use clear file names when similar takes are easy to confuse.
-
Trim unwanted heads and tails
Remove black frames, countdowns, silence, repeated material, or incomplete frames before joining. Listen across each boundary as well as watching it.
-
Choose one output profile
Select the resolution, frame rate, video codec, and audio settings for the destination. Mismatched sources normally require a new encoded output rather than a direct stream join.
-
Export and verify the combined file
Play every join point outside the editor. Also check the beginning, middle, ending, total duration, audio sync, aspect ratio, and final file size.
Keep joined WMV video consistent
- Keep the originals. Export the combined result as a new file so an ordering or encoding mistake is reversible.
- Choose one frame size. Decide whether smaller clips should fit with borders or be cropped; do not stretch them.
- Choose one frame rate. Review motion carefully when sources differ because normalization can introduce duplicate or dropped frames.
- Match audio levels. Large volume changes make an otherwise clean visual join feel abrupt.
Understand direct joining and re-encoding
Joining without re-encoding is practical only when the streams closely match in codec, dimensions, frame rate, profile, audio settings, and timing. If those properties differ, the safer approach is to decode the clips and export one consistent file.
Legacy WMV remains useful in some Windows workflows, but a modern destination may work better with a compatible MP4 copy. Choose the format according to the receiving player or system rather than changing the file extension.
Fix common WMV joining problems
A gap, frozen frame, or repeated frame appears at the join
Trim incomplete material from the end of the first clip and the beginning of the next. Preview several seconds on both sides of the boundary before exporting again.
The image size changes between clips
The sources use different dimensions or aspect ratios. Select one output canvas and choose a consistent fit, crop, or border policy.
Audio clicks or changes volume suddenly
Trim silence or waveform discontinuities and normalize obvious level differences. Use Video Studio for a short audio fade when a hard cut still sounds distracting.
The merged file will not play on another device
WMV support varies by destination. Confirm the actual Windows Media codec and audio format, or create a compatible delivery copy for that device.
Frequently Asked Questions
How do I merge WMV files on Windows?
Open Joiner in GiliSoft Video Editor Pro, add the WMV clips, arrange them in order, preview every boundary, choose one output profile, and export a separate combined file.
Can I join WMV files without losing quality?
A fast join may avoid re-encoding when the source streams closely match. Files with different codecs, dimensions, frame rates, or audio settings normally require a new encoded output.
Can WMV files with different resolutions be merged?
Yes, but select one output resolution and decide whether each clip should fit, crop, or retain borders. Preview the result to avoid stretching.
Why is there a gap or audio click between joined clips?
A source may contain silence, an incomplete frame, mismatched timestamps, or an abrupt waveform boundary. Trim the ends and preview the join; use Video Studio for a short fade when needed.
When should I use Video Studio instead of Joiner?
Use Joiner for ordered clip combination. Use Video Studio when the result needs transitions, overlays, separate audio, titles, or complex multitrack timing.