
Decide Whether MP3 Is the Right FLAC Output
Quick answer: Use MP3 when compatibility and smaller files matter more than preserving lossless audio. Keep FLAC as the archive or editing source because converting FLAC to MP3 removes audio information and converting that MP3 back to FLAC cannot restore it.
| Goal | Recommended output | Reason |
|---|---|---|
| Archive or future editing | Keep FLAC | Lossless source remains available |
| Phones, cars, and general playback | MP3 listening copy | Broad compatibility and smaller size |
| Further professional editing | FLAC or WAV | Avoid another lossy generation |
| Email or limited storage | Lower-bitrate MP3 test | Smaller output with a quality tradeoff |
Prepare a FLAC Library Before Batch Conversion
Treat MP3 files as derivatives rather than replacements. A clean source folder and consistent metadata make a large conversion easier to verify.
Keep originals separate
Write MP3 files to a new folder and leave the FLAC library unchanged.
Check tags first
Review artist, album, track number, title, and artwork before a large batch.
Choose for the destination
Test the MP3 quality setting on the phone, car, player, or upload service that will receive it.
Use stable filenames
Include disc and track numbers when album order matters.
Convert FLAC to MP3 in 6 Steps
Create a separate MP3 output folder
Keep the FLAC masters and converted listening copies in different locations.
Add FLAC files or folders
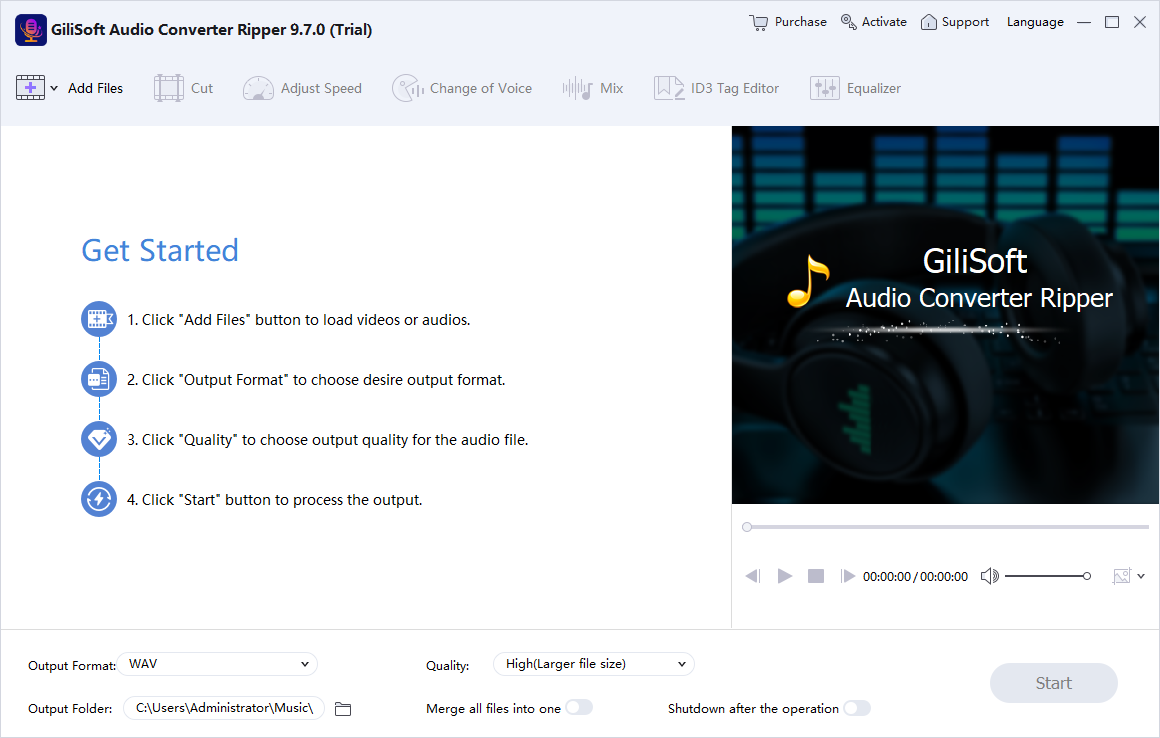
Open GiliSoft Audio Converter Ripper and import the tracks you want to process.
Choose MP3 as the output format
Select MP3 and review the available bitrate, sample-rate, channel, and quality options.
Test one representative track
Use a track with quiet and loud passages, vocals, and detailed high frequencies to judge the setting.
Run the batch conversion
Confirm the output folder and convert the selected files.
Verify audio and metadata
Check duration, playback, track order, filenames, title, artist, album, and the beginning and ending of several files.
Understand the FLAC-to-MP3 Quality Tradeoff
Lossless source
FLAC can reproduce the encoded source without lossy compression.
Lossy output
MP3 reduces size by discarding information; quality depends on the chosen encoding settings.
No quality recovery
A later MP3-to-FLAC conversion only makes a larger container around already-lossy audio.
Listening test
Judge the converted file on the real destination device, not by file size alone.
Important: Do not delete the FLAC originals after conversion unless another verified lossless backup exists. MP3 is usually a delivery copy, not the archival master.
Batch-Convert FLAC with Audio Converter Ripper
GiliSoft Audio Converter Ripper combines batch format conversion, output settings, trimming, mixing, equalizer tools, voice effects, and ID3 tag editing. It is useful when a lossless collection needs organized MP3 copies for several players or destinations.
- Convert several folders in one queue instead of repeating one file at a time.
- Test one quality setting before processing the complete library.
- Use the ID3 editor when MP3 title, artist, album, genre, or track information needs correction.
Troubleshoot Common Audio Workflow Problems
- MP3 files sound dull or distorted: Choose a higher-quality setting and test again from the original FLAC, not from a previous MP3.
- Album order is wrong: Use track-number tags and filenames with leading zeros.
- Converted files are still large: Review bitrate, channel mode, and duration; lower settings reduce size but may reduce quality.
- Tags are missing: Edit the MP3 metadata after conversion and verify it in the destination player.
- Some FLAC files fail: Confirm the files play correctly and are not damaged before retrying them separately.
- Output overwrites another batch: Use a dedicated destination folder and a predictable filename rule.
Keep the Lossless Source and Conversion Rights
Retain the FLAC originals for archive and future editing, and convert only audio you own or are authorized to process. A convenient MP3 copy does not change copyright or distribution rights.
Frequently Asked Questions
Does converting FLAC to MP3 improve compatibility?
Usually yes. MP3 is supported by many phones, cars, players, and publishing systems that may not accept FLAC.
Will FLAC to MP3 preserve lossless quality?
No. MP3 is a lossy format. Keep the original FLAC when lossless preservation matters.
Can I batch-convert a FLAC folder?
Yes. Add multiple files or folders, choose one MP3 profile and output folder, then verify the completed batch.
Should I convert an MP3 back to FLAC later?
That does not restore discarded audio information. Return to the original FLAC when a lossless source is needed.
Can metadata be kept or corrected?
Review the converted files and use the available ID3 tag editor for MP3 title, artist, album, genre, and track data.
What should I test before a large batch?
Convert one representative track and check quality, size, metadata, duration, start, end, and playback on the destination device.