
How to Create a Protected Disc for Customers
A customer disc can present setup notes openly while keeping contracts, licensed files, or private documentation in a password-protected area. The distinction must be visible before the disc leaves your team.
Quick answer
Put welcome and support files in the public area, place confidential deliverables in the secure area, set a password, and create a disc or encrypted ISO with GiliSoft Secure Disc Creator. Test it as a customer would.
Choose the Right Disc Workflow
A final optical disc is useful for a one-time shipment. Create an ISO first if the package needs internal approval, multiple identical copies, or a delayed burn.
| Output | Best use | Validation |
|---|---|---|
| Protected CD or DVD | Physical offline handoff | Reinsert and read-test on a recipient-like PC |
| Encrypted ISO image | Review, archive, or later burning | Mount and test public and secure areas |
| Approved ISO burned to disc | Repeatable copies of one reviewed release | Test the actual burned media as well as the ISO |
Customer handoff: Step-by-Step
- Approve the customer file set
Remove drafts, internal notes, hidden sheets, and files the customer should not receive. Keep a separate publisher copy of the approved source.
- Build public and secure areas
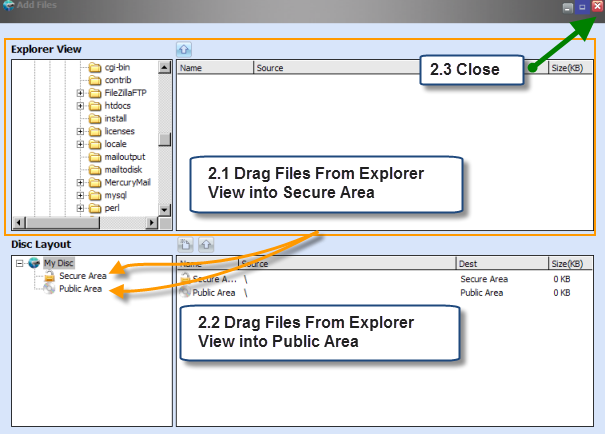
In GiliSoft Secure Disc Creator, add a short README, contact details, and opening instructions to the public area. Add contracts or private assets only to the secure area.
- Set the password and produce the output
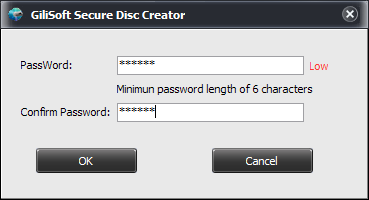
Use a strong password, then burn compatible blank media or make an encrypted ISO for review. Give the password by a separate channel, not on the disc label or in its public area.
- Test the customer path
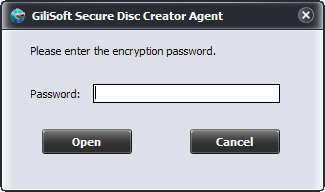
Open the public files without a password. Run the included agent.exe, enter the password, open representative protected files, and repeat the test on a recipient-like Windows PC.
See the full Secure Disc Creator user guide for the product's controls and the complete disc or ISO workflow.
GiliSoft Secure Disc Creator Interface
These product screenshots show the actual file-area, password, burn, image, or recipient controls used in this workflow.
Verify Before Distribution
- Confirm the final file list, version, and media capacity.
- Open public files without a password and protected files only after entering it.
- Test the intended Windows computer, optical drive, and recipient instructions.
- Record the publisher copy and give the password through a separate channel.
Frequently Asked Questions
Can customers see the public files without the password?
Yes. Files deliberately placed in the public area are open; the secure area requires the password.
Does a customer need the full authoring program?
The guide shows the included disc agent for opening protected content; test it on the customer Windows environment before shipment.