
Create a Secure Training Disc for Offline Lessons
A training disc often travels to classrooms or remote sites with limited connectivity. Its protection must not prevent legitimate learners from opening lessons, finding instructions, or getting accessible materials.
Quick answer
Place opening instructions and support details in the public area, lessons and licensed assets in the secure area, set a training password, then test the disc and included agent on a learner-like Windows PC.
Choose the Right Disc Workflow
Create an ISO first when several identical classroom discs need approval and duplication. Direct burn works for one small, stable lesson set.
| Output | Best use | Validation |
|---|---|---|
| Protected CD or DVD | Physical offline handoff | Reinsert and read-test on a recipient-like PC |
| Encrypted ISO image | Review, archive, or later burning | Mount and test public and secure areas |
| Approved ISO burned to disc | Repeatable copies of one reviewed release | Test the actual burned media as well as the ISO |
Offline training: Step-by-Step
- Freeze the course version
Confirm the permitted lesson files, offline video codecs, captions, handouts, and accessible alternatives. Remove instructor-only answers or unpublished material.
- Add clear opening notes
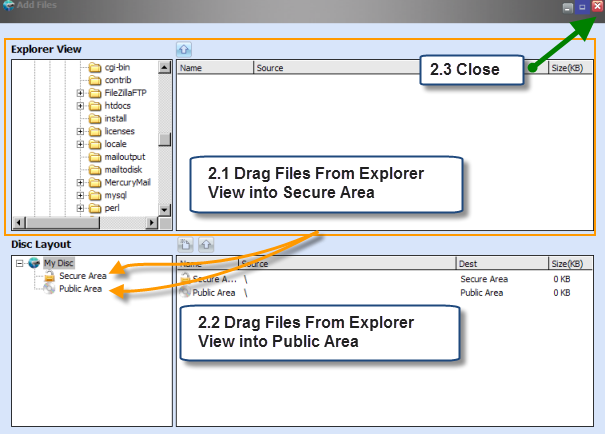
Put the course title, version, basic access steps, and support route in the public area. Put licensed lessons and private resources in the secure area.
- Create the protected disc or ISO
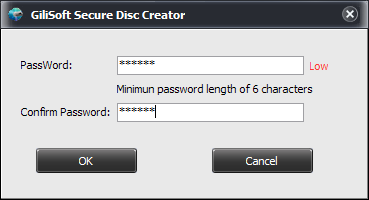
In GiliSoft Secure Disc Creator, choose direct burning or ISO creation, set the secure-area password, and keep the password handoff separate from the disc.
- Run a learner acceptance test
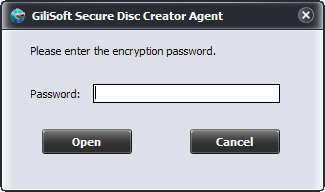
On a typical learner Windows PC, read the public instructions, start the included agent.exe, unlock the secure area, and sample videos, captions, documents, and audio.
See the full Secure Disc Creator user guide for the product's controls and the complete disc or ISO workflow.
GiliSoft Secure Disc Creator Interface
These product screenshots show the actual file-area, password, burn, image, or recipient controls used in this workflow.
Verify Before Distribution
- Confirm the final file list, version, and media capacity.
- Open public files without a password and protected files only after entering it.
- Test the intended Windows computer, optical drive, and recipient instructions.
- Record the publisher copy and give the password through a separate channel.
Frequently Asked Questions
Can a learner open the disc without the creator application?
The product guide shows an included disc agent for secure-area access. Test it on the learner environment before producing copies.
What belongs in the public area?
Only information safe for anyone holding the disc: course identification, opening steps, and support contacts.