
Image Recovery Software for Deleted Photos on Windows
Use this workflow to scan for deleted photo files without overwriting the storage that may still contain them. Decide the destination first, keep the original, and approve a representative output before processing the full set.
Quick answer
Stop using the source drive or memory card, install GiliSoft Data Recovery on another drive, choose the relevant deleted-file or removable-media mode, preview found photos, and recover selected files to a different physical drive. Open each recovered file before relying on it.
Choose the Right Image Workflow
| Situation | Recommended approach | What to verify |
|---|---|---|
| Recently deleted photos | Stop using the source and scan for deletion | Preview and file integrity |
| Memory card loss | Connect read-only where practical and scan removable media | Correct card and separate output drive |
| Physically failing storage | Stop repeated software scans | Professional recovery assessment |
Step-by-Step Workflow
- Stop writing to the source
Do not take more photos, install software, format, repair, or save recovered files on the affected drive or card.
- Prepare a separate recovery destination
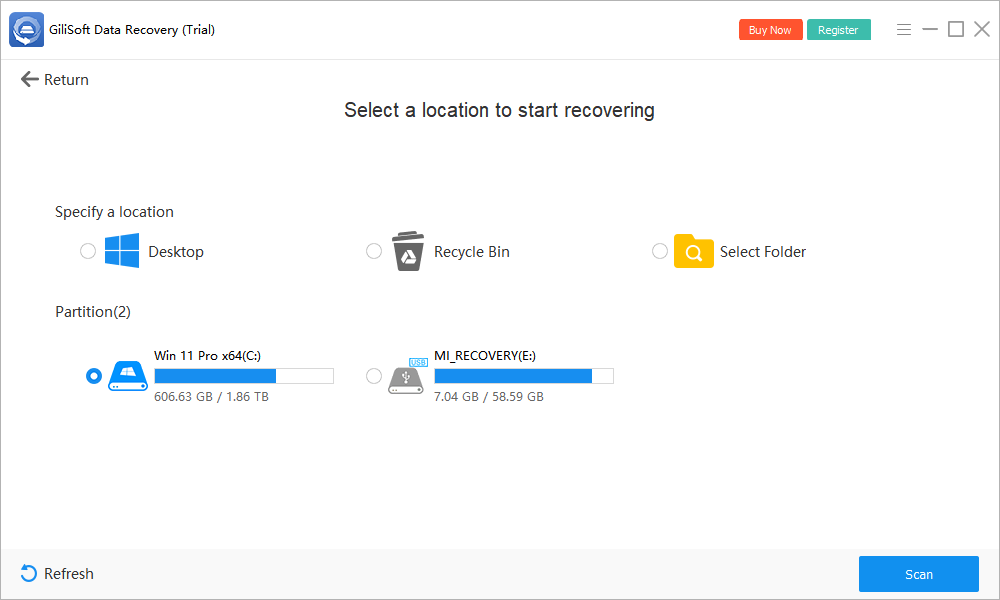
Use another physical drive with enough free space and connect the source only when ready to scan.
- Choose the matching recovery mode
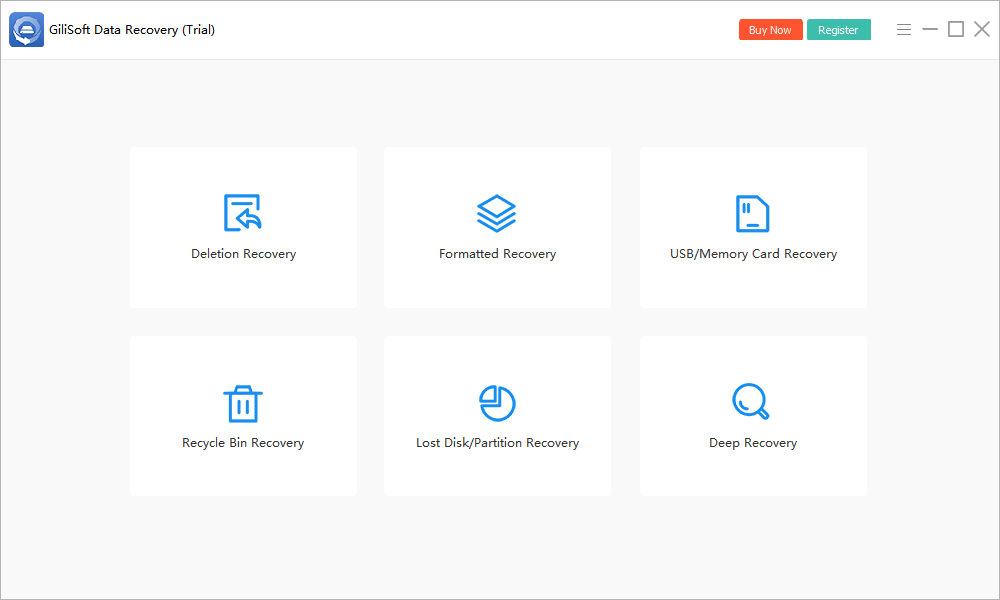
Open GiliSoft Data Recovery and select deleted-file or removable-media recovery according to the loss event.
- Scan and preview carefully
Filter for image types, compare paths and dates, and preview files where possible before selecting them.
- Recover and verify
Write selected photos to the separate destination, open them fully, and keep incomplete results for a deeper or professional attempt.
Use the GiliSoft Data Recovery Workspace
These screenshots show real product workspaces for this task. Test the installed build with your own source formats and destination requirements before a large batch.
Review the Output Before Delivery
| Source preservation, preview, separate-destination recovery, and file integrity | Compare the output with both the source and the destination requirement. |
|---|---|
| Visual quality | Inspect small text, edges, gradients, faces, transparency, orientation, cropping, and color at useful zoom levels. |
| File handling | Confirm format, dimensions, filename, output folder, file size, source retention, and permission to publish or share. |
Frequently Asked Questions
Is image recovery the same as photo repair?
No. Recovery attempts to retrieve deleted or lost files. Photo repair improves a file that still exists, and visual restoration improves its appearance.
Can GiliSoft Image Editor recover deleted photos?
No. Use GiliSoft Data Recovery for deleted files; use Image Editor only after a usable photo file has been recovered.
Where should recovered photos be saved?
Use a different physical drive so the recovery process does not overwrite other recoverable data on the source.
Should I overwrite the source images?
No. Keep originals and export prepared copies to a separate folder until the destination output has been reviewed.
Why test one difficult image first?
A normal sample may hide problems with transparency, small text, unusual orientation, gradients, metadata, or very large dimensions.