
Can You Remove a Watermark from a Screenshot?
Yes, if you own the screenshot or have permission to edit it and enough surrounding interface detail remains available to reconstruct the marked area.
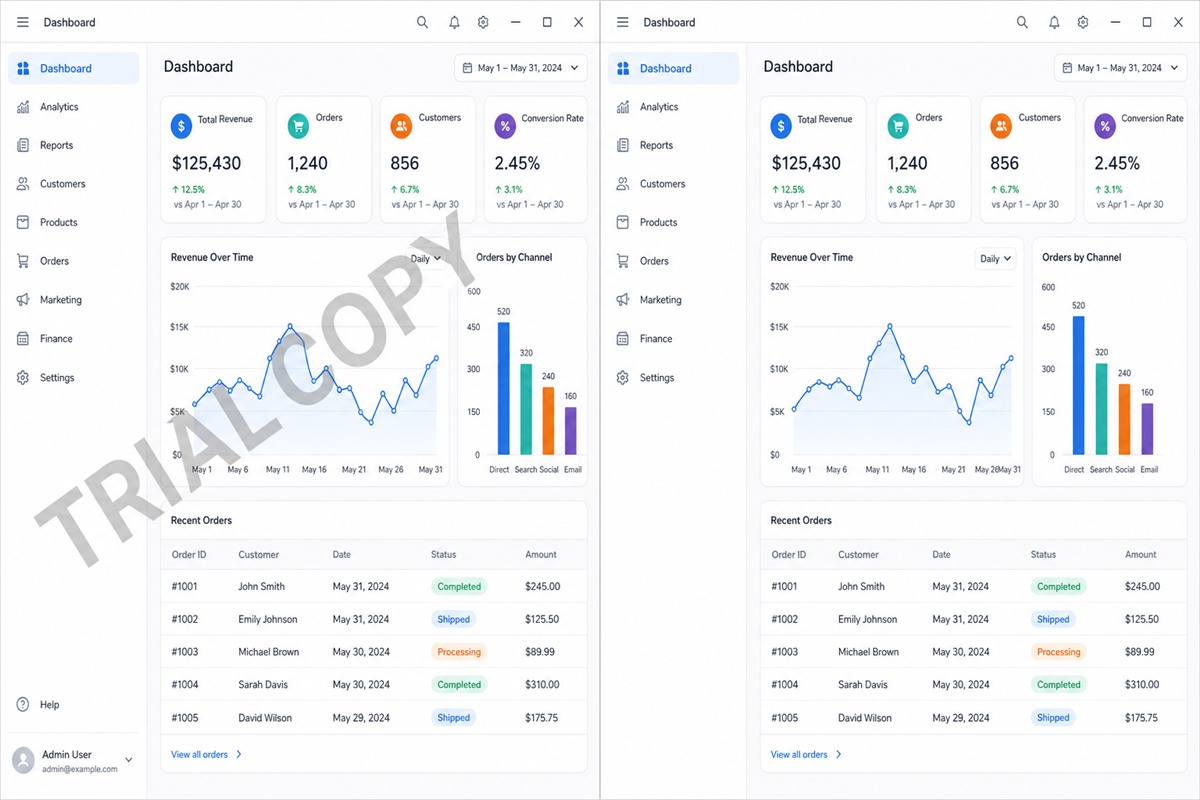
Small corner logos over a plain title bar or empty panel are usually easier than a diagonal trial mark crossing numbers, text, icons, charts, table rows, and window borders. The tool must approximate anything hidden by the watermark; it cannot reveal original interface pixels that are absent from the screenshot.
Before Editing, Check Whether You Can Capture a Clean Screenshot
Recreating the screenshot usually produces sharper interface text and more accurate controls than reconstructing pixels.
Recapture the application
Open the licensed or correctly configured software, return to the same view, hide temporary prompts, and take a fresh capture at the intended display scale.
Export from the source
For dashboards, slides, diagrams, or design files, use the product's own export or presentation mode instead of photographing or recapturing a rendered screen.
Crop an unused edge
When a logo sits entirely outside the useful UI area, cropping keeps genuine pixels and avoids invented interface detail.
Use cleanup only when needed
MarkEase is practical when the original screen cannot be reproduced and cropping would remove important context from an authorized screenshot.
Trial watermarks require a licensing solution first
If a software trial placed the watermark, the correct workflow is normally to activate the product and recreate or re-export the image. Removing the mark from an old screenshot does not change the underlying license terms or prove that the software was licensed when captured.
Why Screenshot Watermarks Can Be Difficult to Remove
Interface screenshots contain compact, high-contrast detail. Even a small repair error can make a button label, chart line, table border, or number look visibly wrong.
Easier: plain panels and title bars
Uniform white, gray, or solid-color UI regions provide repeatable pixels and clear boundaries around the watermark.
Harder: text and numbers
A mark crossing menu labels, file paths, dates, prices, account names, or metrics hides exact characters that should not be guessed.
Easier: isolated corner logos
A compact logo with space around it can often be selected without touching nearby controls or content.
Harder: charts and table grids
Diagonal overlays can break line thickness, data points, bar heights, column borders, and repeated spacing across several UI surfaces.
Watch anti-aliasing and display scaling
Watermark edges may include transparency, glow, shadow, and blended pixels. Windows scaling and JPEG compression can also soften UI text. Include the complete watermark halo, but keep the selection tight enough to protect the original interface.
How to Remove a Screenshot Watermark with GiliSoft MarkEase
Use the original PNG capture when available. A compressed screenshot copied through chat or email contains fewer clean edge pixels for repair.
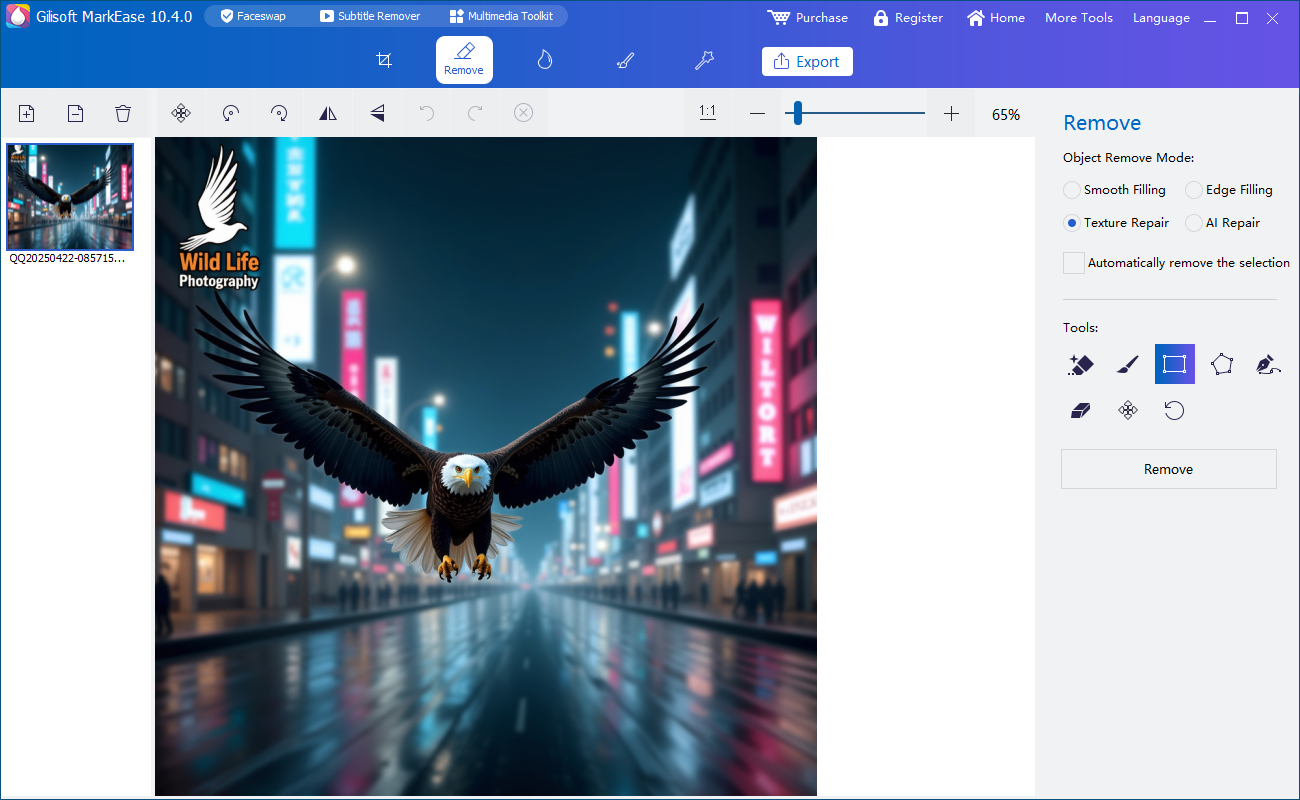
- Open the best authorized screenshotUse the original-resolution PNG or highest-quality copy and preserve the untouched source.
- Map everything beneath the watermarkIdentify text, icons, chart lines, table cells, borders, gradients, and panel backgrounds that the mark crosses.
- Select the complete overlayInclude transparent edges, outline, shadow, glow, and disconnected logo parts without covering extra interface detail.
- Divide the watermark by UI regionRepair plain panels, text rows, chart areas, sidebars, and window borders in separate passes rather than one large diagonal mask.
- Inspect the screenshot at 100%Check spelling, numbers, icon shapes, line alignment, table spacing, color seams, duplicated patterns, and blurred patches.
- Export a separate PNGOpen the result outside MarkEase and compare it with the original at both full size and the final documentation or presentation size.
Test screenshot cleanup with MarkEase
Download GiliSoft MarkEase for Windows and test one representative authorized screenshot. Judge the smallest text and interface lines at full resolution before editing the rest of the set.
Download MarkEase TrialScreenshot Watermark Removal vs Safer Alternatives
| Method | Best use | Advantage | Limitation |
|---|---|---|---|
| Recapture or re-export | You control the source application, dashboard, slide, or design | Preserves real text, icons, charts, and layout at full quality | The exact historic state may no longer be reproducible |
| GiliSoft MarkEase cleanup | An authorized screenshot cannot be recreated and nearby UI supports repair | Preserves the full frame in a focused Windows workflow | Reconstructs hidden pixels and can misread detailed UI |
| Crop the screenshot | The watermark is confined to an expendable edge | Uses only genuine remaining pixels | Can remove menus, context, dimensions, or callouts |
| Manual clone and redraw | Lines, icons, patterns, or interface text need precise restoration | Provides detailed source-pixel and geometry control | Requires more time and editing skill |
| Opaque redaction | The goal is hiding passwords, keys, identities, or confidential values | Clearly removes visible sensitive pixels when flattened correctly | Intentionally obscures content rather than rebuilding the UI |
Why repaired pixels need review
Adobe describes Content-Aware Fill as replacing a selected region with surrounding pixels and provides sampling controls. Microsoft Photos offers local brush and mask controls but notes that generated results may not meet expectations. GIMP's Heal tool relies on a selected source and warns that repeated healing can create smudging.
Editing principles consulted: Adobe Content-Aware Fill, Adobe sampling controls, Microsoft Generative Erase, and GIMP Heal documentation.
Do Not Use Cleanup as Security Redaction
If a screenshot contains a password, API key, recovery code, customer identity, email address, internal URL, serial number, or confidential metric, visual reconstruction is the wrong objective. The goal should be to remove access to the sensitive pixels, not make the surrounding interface look natural.
Keep documentation accurate
When cleaning a screenshot for a manual or lesson, do not reconstruct controls, numbers, or statuses that never existed. A fresh capture from the actual product is more reliable than a visually convincing but inaccurate repair.
Screenshot Watermark Removal FAQ
Can a watermark be removed from a screenshot?
Yes, when you are authorized to edit it and the interface beneath the mark can be reconstructed from surrounding pixels. Recapturing a clean screen is usually preferable.
Should I remove a trial watermark?
The preferred solution is to license the software or recreate the screenshot under permitted conditions. Do not remove a trial mark to misrepresent licensing status.
Why do repaired UI text and icons look wrong?
The watermark may cover exact characters or geometry that does not exist elsewhere in the image. Repair smaller sections, redraw authorized elements manually, or recapture the screen.
Can MarkEase remove a logo or date from a screenshot?
It can be used to select authorized logos, dates, labels, and overlay text. Results depend on opacity, size, interface detail, and selection accuracy.
Can I hide a password or API key with watermark removal?
No. Use opaque redaction or a clean recapture, flatten the output, and rotate any secret that may already have been exposed.
Should I overwrite the original screenshot?
No. Keep the source and export the cleaned screenshot as a separate file for comparison and recovery.


