Add the desktop executable
Open Desktop Apps (EXE) and select Add. Choose the executable for the application you want to lock. If you start from a shortcut, confirm that the displayed target is the program that actually runs.

Password-protect private apps or stop unwanted programs from opening. Control desktop EXE and supported Microsoft Store apps on Windows.
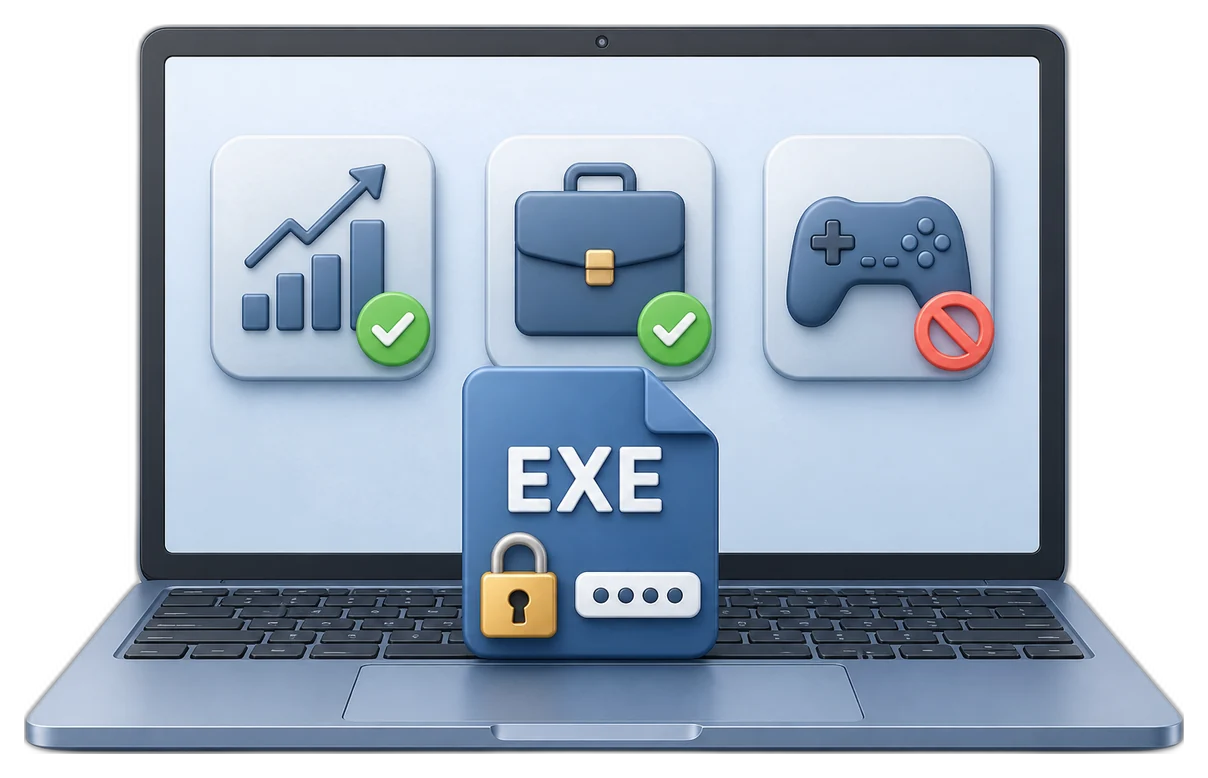
Choose the app-control task you need: lock a desktop program, protect a Store app, require a password, block launches, or release access. Follow the matching steps for passwords, trusted apps, logs, and recovery on Windows 11 and Windows 10.
Use Change Password for the one password that protects management and app approval.
Configure Set Email before a forgotten password prevents access.
Add a known EXE through App Whitelist, not through the protected list.
Use Add Store App for the intended installed Store target.
Check built-in trusted entries when an app cannot be added to the lock list.
Add the executable, choose its launch behavior, and test the normal shortcut.
Use the supported drop area and verify the executable behind a .lnk file.
Find a supported installed target in Store Apps (UWP) and check its status.
Use the selection controls to review the right entries before changing them.
Set the launch behavior for the protected list in Lock Policy.
Compare Running status, target counts, and a fresh app launch.
Release protection for maintenance, then restore it with the app list intact.
Change the intended rule without temporarily releasing every protected app.
Match the event time, process, action, and status to your test launch.
Recheck the executable path or Store target after an update or reinstall.
Use the recovery route associated with the email set in EXE Lock.
Change the password used to open EXE Lock and approve protected app launches. Both uses share the same credential.
Go to Settings, or use Open Settings on the Dashboard. Find Startup / Release Password.
Select Change Password and complete the password dialog shown by your installed version. Keep the new password available to the person managing app access.
Reopen EXE Lock with the new password. If you use Password Verification, close a protected app and test its next launch with the new password too.
The release password is also the management password. For supervised use, enter it yourself when the app asks; do not treat it as a separate password for just one application.
Set the email associated with password recovery while you still have access to Settings.
In Settings, find Email Settings beneath the password section. Select Set Email.
Complete the email dialog and any confirmation it presents. Use an address whose inbox you can still open without relying on an app that you are about to lock.
Review the address when the person managing the PC changes or the mailbox is retired. See password recovery if you are already unable to enter EXE Lock.
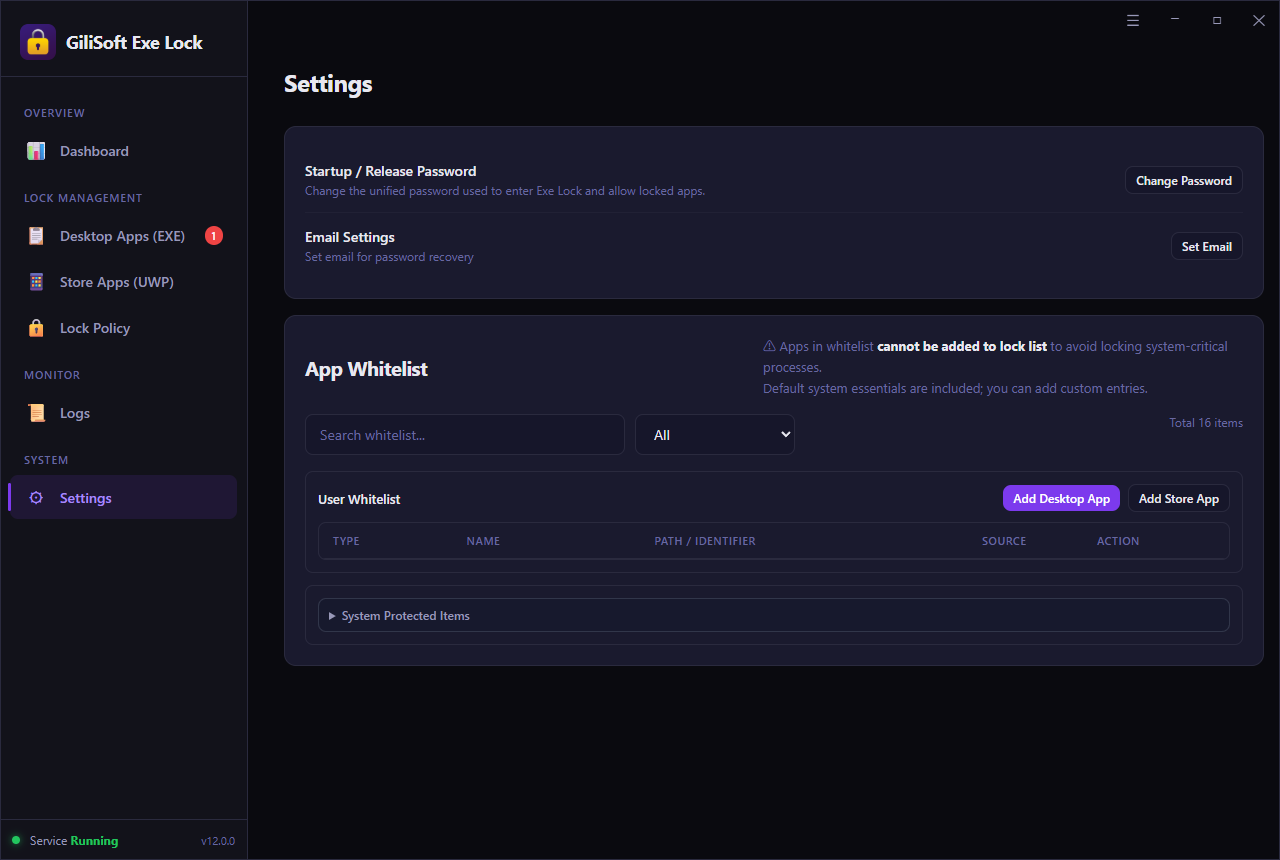
See Set Email in the Settings screenshot. Keep this address accessible so you can complete recovery when needed.
Use the whitelist for a desktop app that must stay outside EXE Lock restrictions.
Go to Settings > App Whitelist and find User Whitelist. This is separate from Desktop Apps (EXE), where you add programs to protect.
Select Add Desktop App and choose the intended program. Review its PATH / IDENTIFIER rather than relying only on the display name.
Whitelisted apps cannot be added to the lock list. If this app already has a protected entry, review and remove its lock rule as needed, then test its normal launch instead of assuming a new whitelist entry released it.
Use Search whitelist... to find an existing entry. The Settings screenshot shows the User Whitelist, type selector, and separate desktop and Store add buttons.
Keep a trusted Microsoft Store app outside the protected list without treating every detected package as trusted.
Open Settings > App Whitelist and select Add Store App in User Whitelist.
Select the target for the app you want to keep available. Check its name and PATH / IDENTIFIER; similarly named packages or extensions can have different roles.
Confirm the intended app appears in the user whitelist. If it was already locked, review its current rule in Store Apps (UWP) and test the normal Start menu entry.
Adding an app to the whitelist is not the same as adding it to Store Apps (UWP) for locking. Choose the list that matches your intention.
Built-in trusted entries help keep essential Windows components out of the lock list.
In Settings > App Whitelist, expand System Protected Items beneath User Whitelist.
Review the entries when EXE Lock will not let you add a target. A system-protected or user-whitelisted app is deliberately kept outside the lock list.
If your aim is to restrict a game, browser, or business tool, return to that application's executable or Store target. Do not substitute an essential Windows process for the app you meant to lock.
See the System Protected Items section in Settings. User-added trusted entries and built-in system entries are shown separately.
Add one desktop program, choose how its launch should be handled, and confirm the result. Set your Startup / Release Password first if you intend to approve launches with a password.
Open Desktop Apps (EXE) and select Add. Choose the executable for the application you want to lock. If you start from a shortcut, confirm that the displayed target is the program that actually runs.
Review the app name and full executable path in the target list, then confirm that its status is Locked. The example shows CapCut.exe as a locked desktop target; the filename and location on your PC will differ.
Open Lock Policy and choose Password Verification to require the Startup / Release Password, or Direct Block to prevent launch without a prompt. This policy applies to the protected list, not only to the app you just added.
Check that Dashboard shows Protection Status: Running and that Temporary Unlock is no longer active. Close the protected app, then reopen its normal shortcut. For Password Verification, test an incorrect password and then the correct one; for Direct Block, confirm that the app stays closed.
To add from a shortcut, see the shortcut task. For Store apps, use Store Apps (UWP) instead of treating a package folder as a desktop executable.
EXE Lock supports shortcut targets through the app list drop area. The path behind the shortcut still matters.
Use the supported Drop files here to add protected apps area for the application's .lnk shortcut. The pictured drop area accepts desktop apps, shortcuts, and Store app targets.
Check the full path in the protected target list. A shortcut may open a launcher, which then starts a different EXE; do not decide from the shortcut label alone.
Close the program and reopen it from that shortcut. If it still opens unexpectedly, compare the process in Logs with the target you added and correct the rule.
The Store Apps screenshot shows the supported drop area. For a focused executable example, see how to password-protect an EXE file.
Use the dedicated Store app list for supported installed Microsoft Store targets instead of browsing and changing WindowsApps folder permissions.
Select Store Apps (UWP) in the sidebar. Find the intended installed app and check its path or identifier under the app name.
Select that entry and use the lock control available in the app list. Confirm the status changes to Locked; selecting a checkbox alone is not evidence that the app is protected.
Choose the intended behavior in Lock Policy, close the app, and reopen it from Start. Test under the same Windows account that normally uses it.
If a Store app is missing, check that it is installed for the current Windows account. For more detail, see how to lock Microsoft Store apps.
Review the entries you intend to change before applying an action to more than one app.
Use Desktop Apps (EXE) or Store Apps (UWP). Review app names, paths, and the current Locked or Unlocked labels.
Use individual checkboxes, Select All, Select Locked, or Select Unlocked. These controls select entries; they do not themselves lock, unlock, or hide programs.
Check which rows are selected before using the available app-list action. Afterward, read each affected status and test the intended program rather than assuming every selected target changed successfully.
See the desktop selection toolbar or the Store app selection toolbar. In particular, Select Unlocked means select unlocked entries, not unlock selected apps.
The Lock Policy page sets the launch behavior for the protected target list. Decide whether an app should remain unavailable or open after password approval.
The protected program is prevented from starting without a password prompt. Use it for games, distracting apps, or tools that should not be available on a shared PC.
Expected result: the app does not start. Not seeing a password dialog is normal in this mode.
A launch prompts for the EXE Lock password, and the program runs only after successful verification. Use it when an owner should approve access to finance, work, or personal apps.
Expected result: the app remains blocked until the correct password is entered.
One policy, one password: the interface shown here uses a policy for the protected list and a unified Startup / Release Password. It does not show independent passwords or policy modes for each app.
Choose one launch behavior for the protected target list. The shown version does not assign a separate mode to each app.
Select Lock Policy and review the target count in Lock Policy Settings. The Allow Method area contains both launch options.
Select Password Verification to show a password prompt before a protected app runs. Select Direct Block when it should not start and no prompt should be offered.
Close a protected app and launch it again. Recheck other protected targets too, because the policy applies to the list. With Password Verification, an incorrect password should not release the app.
The two modes use the same protected list. To stop locking only one program, change that app rule instead of switching the global launch policy.
Verify both the running service and the app rule. A Running indicator alone does not confirm that a particular program has been added.
Open Dashboard and look for Protection Status: Running. Make sure a previous Temporary Unlock is no longer releasing protection.
Review Protected Targets and the desktop and Store app counts. Use the adjacent Edit control to open the list you need. The example screenshot shows zero targets, not a completed app lock.
Close the protected app and reopen its normal shortcut or Start menu entry. Match the result to Lock Policy, then inspect Blocked Attempts and Recent Intercept Logs.
The displayed Blocked Attempts count is labeled Since service startup. Use individual event details to investigate a test; do not read this counter as a permanent record of every launch.
Use Temporary Unlock for supervised access or maintenance when you want to keep the protected app list.
On Dashboard, select Temporary Unlock. Complete the confirmation or password request shown by the installed version.
Perform the maintenance or supervised use while protection is released. Treat this as a temporary release of protection, not a permanent exception for just one app.
End the temporary release using the controls shown by EXE Lock. Confirm Protection Status: Running again, close the test app, and check that a fresh launch is blocked or prompts as intended.
See Temporary Unlock on the Dashboard. To leave one application available permanently, use its individual rule rather than leaving protection temporarily released.
Make one program available again while keeping the other protected targets in place.
Open Desktop Apps (EXE) or Store Apps (UWP). Match the path or identifier, and select only the intended entry.
Use the target list's available unlock or remove-rule control. Confirm that the entry is Unlocked or no longer in the protected list; do not use Temporary Unlock as a substitute for this change.
Launch the released app from its normal shortcut, then test another protected app. If the released app should not be added again, add it to the appropriate App Whitelist.
Keep this change separate from Lock Policy, which chooses the launch behavior for the protected list.
Use event records to identify which process was intercepted and whether it matches your intended app.
Note the time, close the selected protected app, and launch it once from the normal shortcut. Use the current Lock Policy to predict whether you expect a block or a password prompt.
On Dashboard, review Recent Intercept Logs and its TIME, PROCESS, ACTION, and STATUS columns. Match the record to your test.
Select Logs in the sidebar to investigate further. Compare the process with the desktop path or Store target in your protected list, especially when a launcher or an app update is involved.
Intercept records help diagnose app-launch restrictions. They are not a record of everything a user does inside the application after it opens.
An update, reinstall, or second copy of an app can change the executable or Store target reached by its usual shortcut.
After updating an app, review its current executable path or Store entry against the protected list. Check whether the usual shortcut now opens a new launcher or location.
If the target has changed, remove the obsolete entry and add the current executable in Desktop Apps (EXE) or the detected target in Store Apps (UWP). Confirm its Locked status.
Check that protection is Running and Temporary Unlock has ended. Launch the updated app from its everyday entry point and compare the result and event records with the chosen Lock Policy.
If an update is blocked while you are supervising it, use Temporary Unlock for the maintenance task, then restore protection and verify the updated target.
Use the recovery route linked to the email configured in EXE Lock. Recovery is separate from temporarily releasing apps when you still know the password.
Follow the password-recovery option presented by your installed version. Use the address configured through Settings > Email Settings > Set Email.
Check that mailbox and follow the recovery message or prompts you receive. Complete the instructions for your installed EXE Lock version before testing access again.
After recovery, confirm you can enter EXE Lock and approve a protected launch under Password Verification. If the mailbox or recovery option is unavailable, contact GiliSoft Support with the installed version and the problem.
Once access is restored, review Set Email and the unified password in Settings. Do not delete program or Windows files to try to remove a lock.
Add targets gradually. A correct setting on the policy screen is useful, but the everyday launch result is what matters.
| Check | Expected result |
|---|---|
| Direct Block | The protected app cannot start; no password prompt is expected. |
| Password Verification | A wrong password does not release the app. The correct password allows the launch. |
| Normal launch route | The desktop shortcut or Start menu entry used every day reaches the intended rule. |
| Trusted apps | Required work apps and essential Windows components remain available. |
| After Temporary Unlock | Protection is Running again, and a new launch is blocked or prompts as intended. |
| After an app update | The target path or package entry is current, and the usual launch still follows the rule. |
| What you see | What to check |
|---|---|
| The app opens without a prompt | Check Lock Policy first: Direct Block does not show a password prompt. If the app runs when it should not, check Running status, Temporary Unlock, its current Locked entry, and the actual executable path. |
| The app is already open | Close it and test a fresh launch. A launch restriction is not proof that an application already running has been closed. |
| A Store app is missing | Check that it is installed for the current Windows account and review Store Apps (UWP). Use only the detected targets supported by EXE Lock. |
| An app cannot be added to the lock list | Review User Whitelist and System Protected Items. A trusted entry is kept outside the protected list; confirm the actual application you meant to restrict. |
| An update changes the launch result | Compare the current executable, package entry, and normal shortcut with the saved rule. Replace an obsolete target and test again after maintenance. |
| Temporary access has ended, but an app still runs | Confirm the temporary release has ended and protection is Running. Close the app, retest a new launch, and compare its target with the intercept record. |
| No record matches the test | Check the test time, current status, and executable path. The initial Dashboard screenshot contains no events; do not treat an empty example or zero counter as proof of a successful test. |
Check that Protection Status is Running and Temporary Unlock is no longer active. Close the app before testing a fresh launch. Verify the full executable path: a shortcut may start a launcher that opens a different program. Review the current target after an app update and check the intercept logs.
Check that the app is installed for the Windows account you are using and review Store Apps (UWP). Only supported detected targets can be managed there. Some apps have several package or executable entries, so confirm the target with a launch test rather than guessing from the name.
Compare the current executable or Store app entry with the protected target. If it is outdated, remove the obsolete rule, add the current target, and retest the normal shortcut. Keep any required trusted apps outside the lock list.
Use Temporary Unlock on the Dashboard for maintenance or supervised access without deleting the protected app list. It temporarily releases protection rather than creating a permanent exception for one app. When finished, restore protection and confirm that Protection Status is Running.
Use the process and path shown in the logs to identify the affected program. Remove its lock rule or change its status if it should no longer be protected. In Settings, the App Whitelist prevents trusted apps from being added to the lock list; review it before adding more targets.
Use the password-recovery route associated with the email configured in Settings. The current interface uses one Startup / Release Password for entering EXE Lock and approving launches. Configure Set Email while you still have access; contact GiliSoft Support if recovery is unavailable.
The interface shown in this guide uses one Startup / Release Password and a Lock Policy for the protected target list. Choose Direct Block or Password Verification for that list; do not treat the settings as separate passwords or independent policy modes for each app.
EXE Lock controls whether a protected application can start on the configured Windows PC. Do not treat a launch restriction as encryption of the executable or every document the application opens. Test the app launch and protect sensitive files separately when needed.
Running describes the protection status, not the contents of the target list. The Dashboard screenshot shows Running with zero Protected Targets. Add the intended executable or supported Store app, confirm its Locked status, choose a Lock Policy, and test a fresh launch.
No. These are selection controls for choosing rows by their current status. Select Unlocked does not unlock selected apps, and Select Locked does not lock them. Review the selected paths, use the appropriate target-list action, and then check the resulting status.
The App Whitelist is designed to keep trusted applications outside the lock list. Review User Whitelist and System Protected Items in Settings. Confirm that you are targeting the intended user application rather than an essential Windows component.
Use the product page for features and license information, or open a focused guide for the kind of app you want to control.
Add the desktop or Store apps you want to control, choose password approval or direct blocking, and keep trusted programs available with the app whitelist.


Enter your email address to get our latest newsletter