

How Do I Lock a File on My Computer?
You can lock a file on Windows with dedicated password-protection software, Windows Encrypting File System, or an encrypted archive. The right choice depends on whether the original file must remain active, access should follow one Windows account, or you need a protected copy for transfer.
For files you open and update regularly: use GiliSoft File Lock Pro to lock, hide, or protect the original item in its current location.
For account-bound encryption: use Windows EFS on a supported edition and back up the encryption certificate.
For sending or storage: place the file inside a password-protected archive.
How to Lock Files on Windows: 3 Common and Efficient Ways
| Method | Best for | How access works |
|---|---|---|
| GiliSoft File Lock Pro | Files that stay in their current folders and are opened or updated regularly | A File Lock Pro password controls locked items; hide and change-protection modes are also available |
| Windows EFS | Files tied to one Windows account on a supported edition | The Windows account and encryption certificate control access |
| Password archive | Protected copies sent, uploaded, or stored as one package | The archive password is required before extraction |
Method 1. Lock Files with Password Protection Software
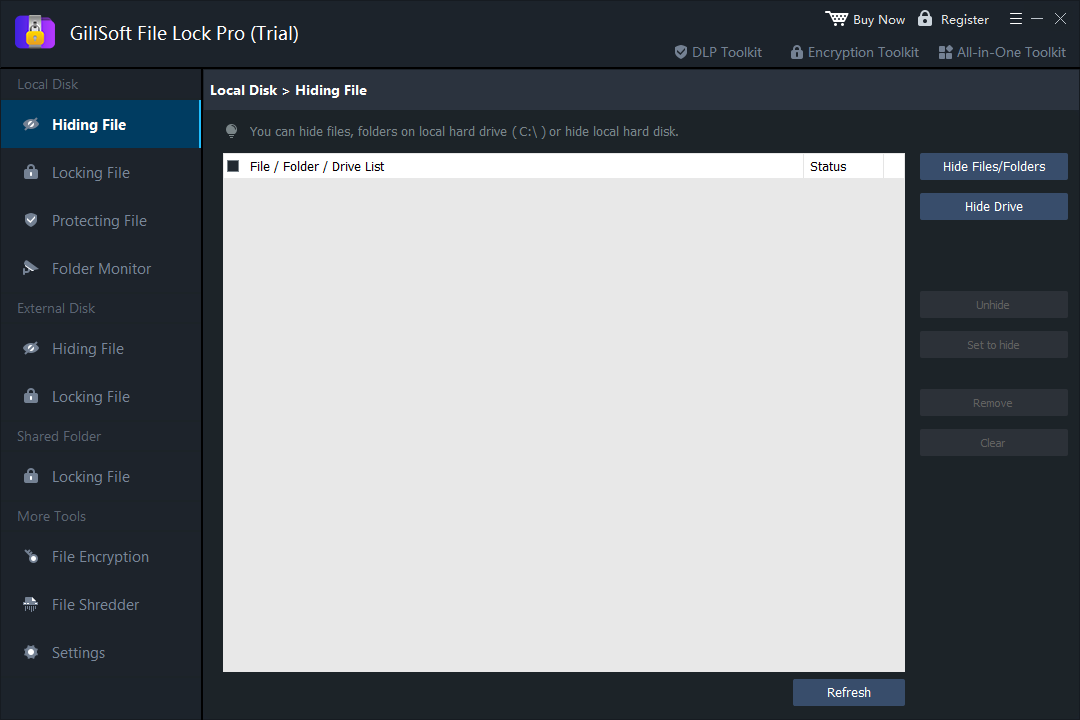
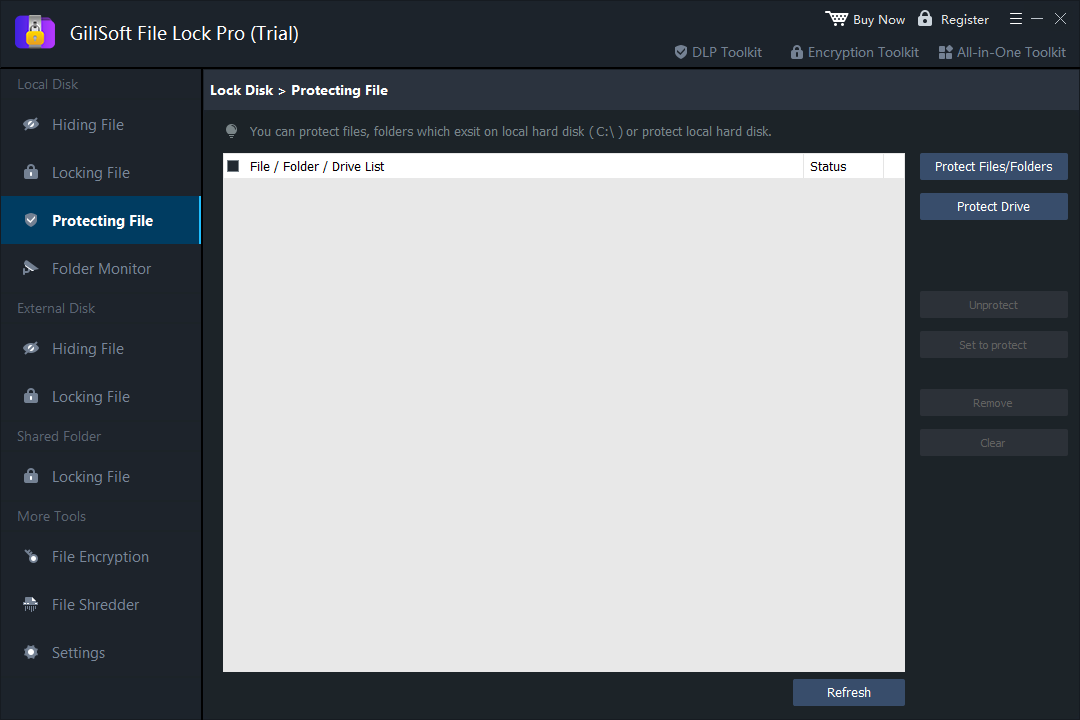
This method keeps the selected file in its original location. You can lock access, hide it from ordinary browsing, or keep it visible while preventing unwanted edits and file operations.
- Open File Lock Pro and enter the master password.
- Choose Local Disk, then open Locking File.
- Click Lock Files/Folders and select the file, folder, or drive you want to protect.
- Apply the lock, then test the item from Windows Explorer.
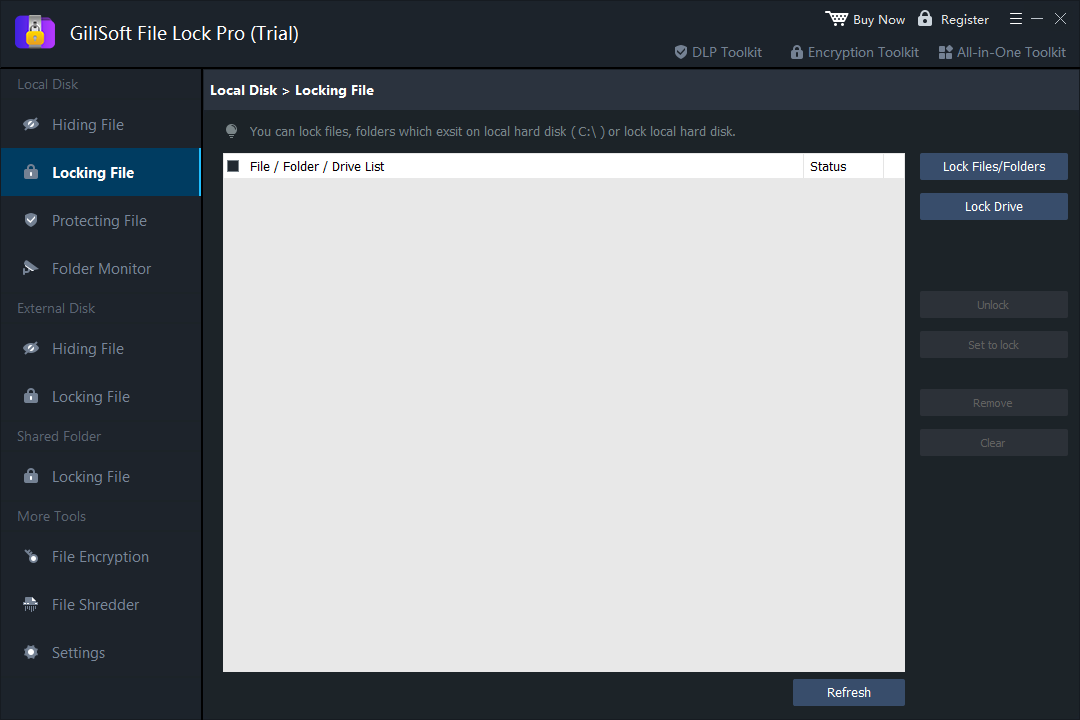
Keeps an item visible but blocks opening it without authorization.
Removes private files, folders, or a drive from ordinary browsing.
Helps prevent unwanted rename, move, delete, write, and copy operations.
Method 2. Encrypt Files with Windows EFS
Encrypting File System (EFS) connects access to a Windows user account and encryption certificate. It is not a separate password prompt for each file, and availability varies by Windows edition.
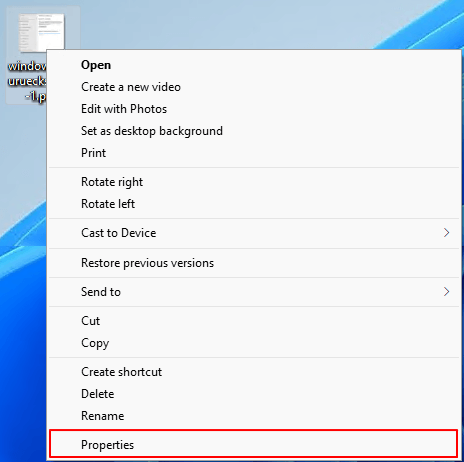
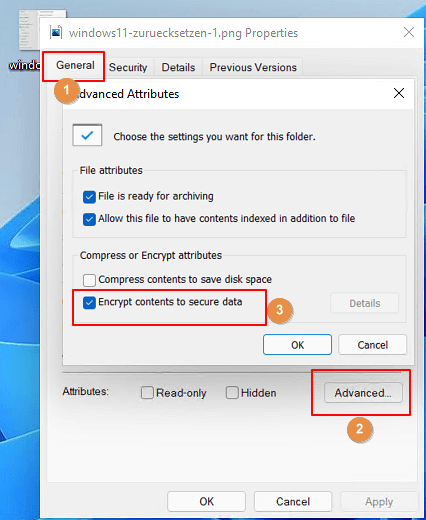
- Right-click the file, choose Properties, and select Advanced.
- Enable Encrypt contents to secure data, then apply the change.
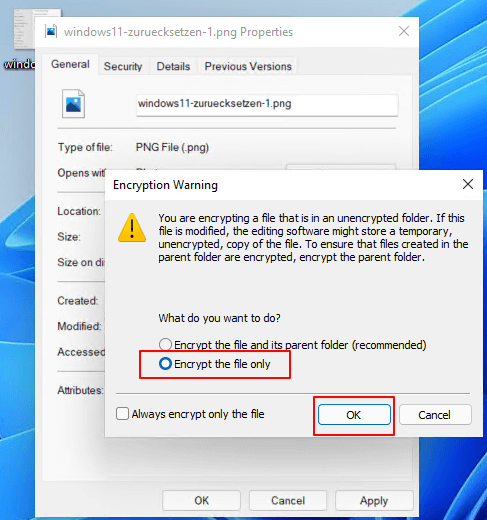
- Choose whether to encrypt only the file or its parent folder as well.
- Back up the EFS certificate and recovery key to a separate safe location.
Method 3. Compress Files into a Password-Protected Archive
A password archive is useful when several files need to travel together by email, cloud storage, or removable drive. It protects the archive copy, not automatically every original file left on the PC.
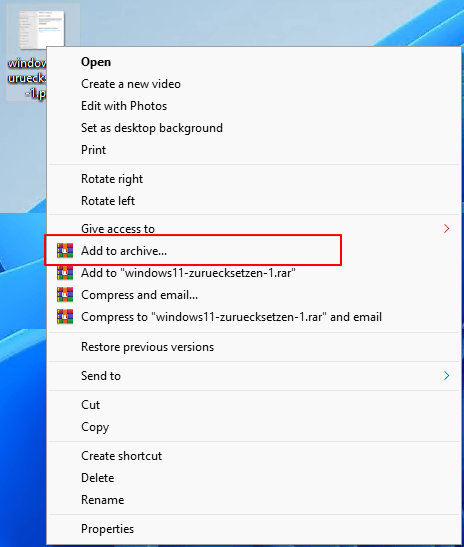
- Select the files and add them to an archive with an archive utility that supports encryption.
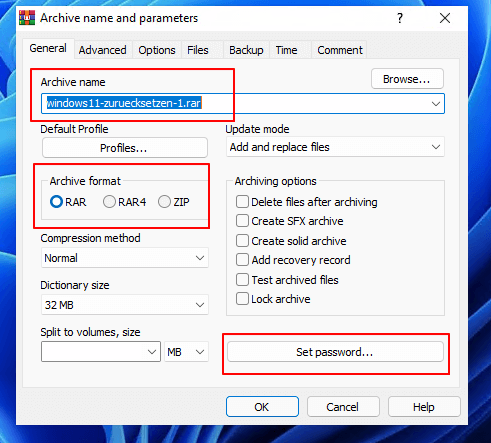
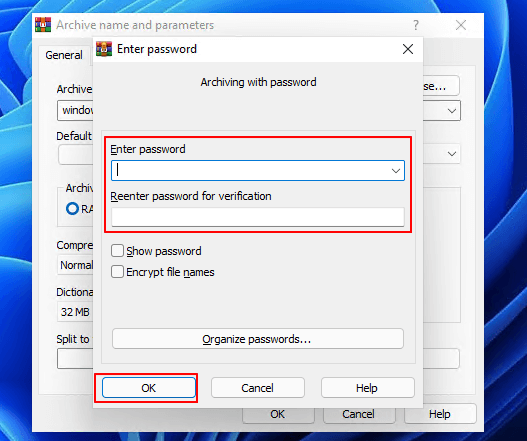
- Choose an encrypted archive format and open its password settings.
- Enter a strong, unique password and create the archive.
- Test extraction, then protect or securely remove any unprotected originals if necessary.
Choose the method that matches the job
- Use File Lock Pro when the original file should remain in place but access or file operations must be controlled.
- Use EFS when account-bound Windows encryption fits your edition and certificate-management plan.
- Use a password archive when you need one protected copy for sending, uploading, or backup.
File locking FAQ
Can I put a password directly on a file in Windows?
Windows does not provide one universal password button for every ordinary file. EFS uses your Windows account and certificate. File Lock Pro provides a dedicated password-controlled locking workflow.
What is the difference between locking and encrypting a file?
Locking controls access to the original file in its current location. Encryption transforms the file data or places it in an encrypted container so it cannot be read without the required key or credentials.
Can I lock files on a USB drive?
Yes. File Lock Pro supports files on USB and external storage. For a portable secure area designed specifically for removable media, see GiliSoft USB Encryption.
How do I prevent a file from being deleted or renamed?
Use the Protecting File workspace in File Lock Pro when the item should remain visible but common file operations such as delete, rename, move, or write need control.
Lock, hide, or protect Windows files from one interface
Use GiliSoft File Lock Pro for local files, folders, drives, USB storage, and shared folders without repacking active files each time you use them.