

Choose the Right Approach
| Situation | Practical approach | What to protect |
|---|---|---|
| Copyright notice | Owner name and optional year | Accuracy and readability |
| Proof or preview | PROOF, SAMPLE, or client identifier | Visibility without obscuring review content |
| Credit line | Photographer or organization name | Consistent placement and spelling |
| Usage label | Internal, confidential, or campaign status | Use policy language approved by the organization |
Prepare the Photo Workflow
Make the source, authorization, output, and review decisions before changing pixels.
Confirm the exact wording
Proofread names, symbols, dates, and usage language.
Choose the final output size
A mark designed on a master can become too small after resizing.
Protect the clean master
Add watermarks to delivery copies, not the only original.
How to Complete the Task on Windows
Work from a preserved source, make controlled changes, and judge the exported result rather than the editor preview alone.
Open the prepared photo in Image Editor
Complete crop, resize, and major color work before final watermark placement.
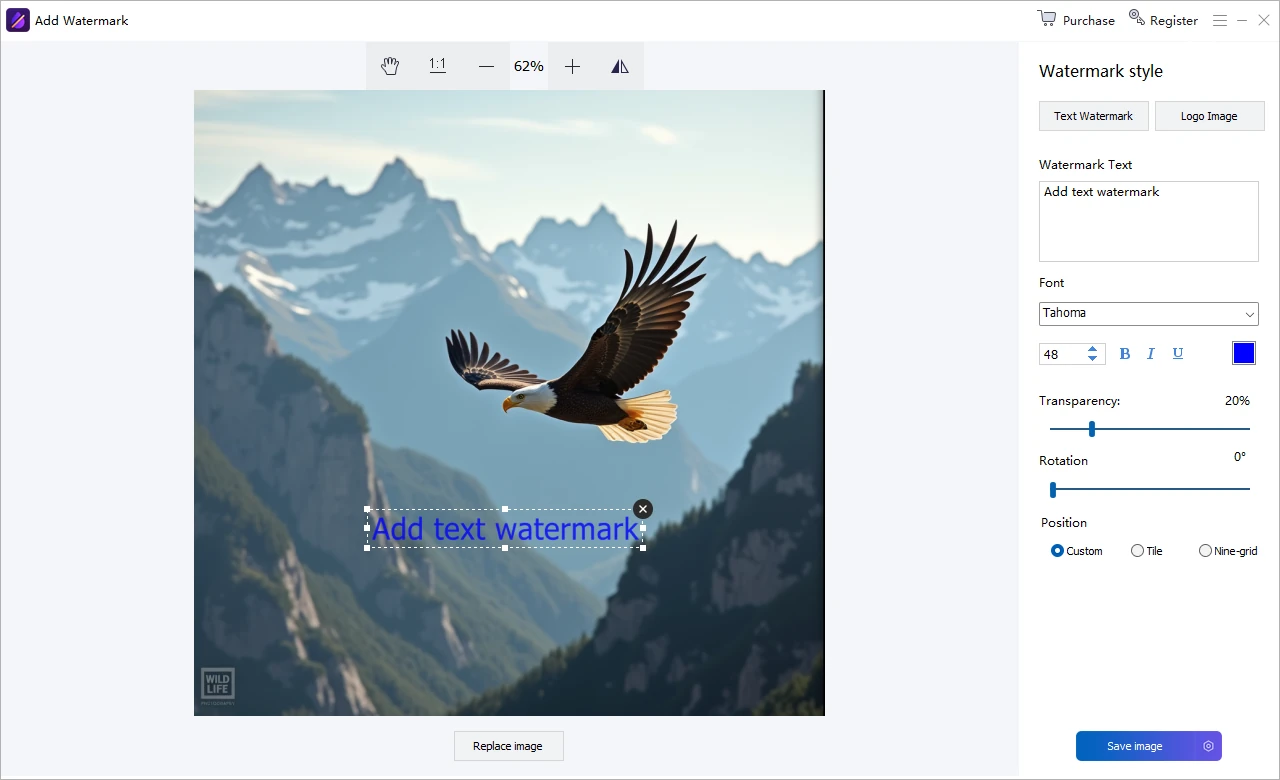
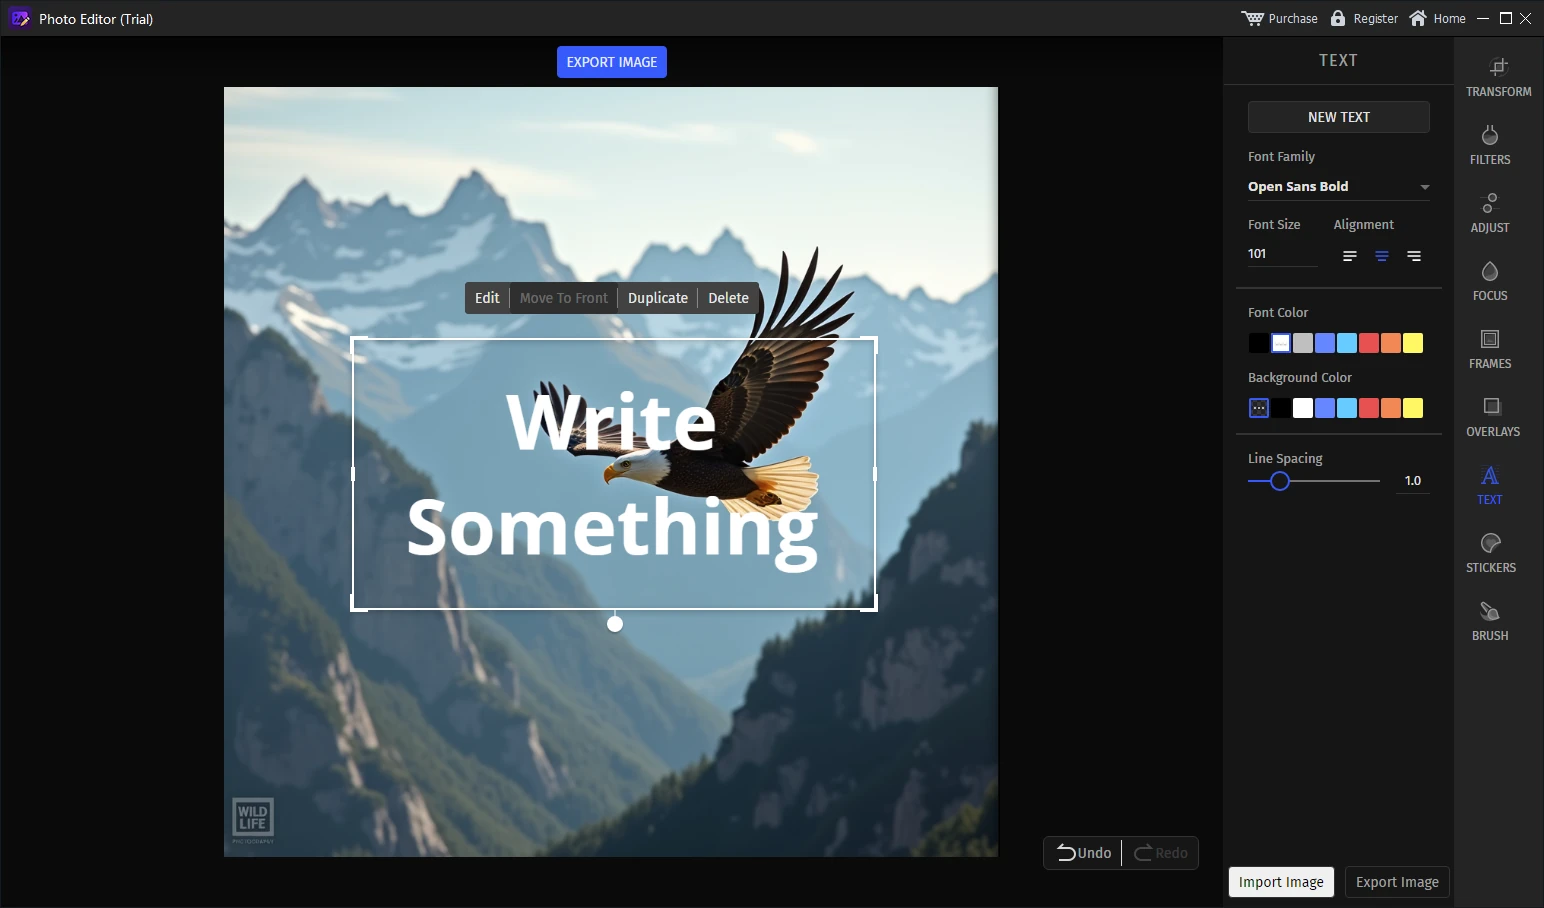
Choose the text watermark tool
Enter the approved wording and select a legible font and style.
Set size, color, and opacity
Balance visibility with the subject and changing tones in the image.
Choose anchor, inset, and rotation
Use a predictable corner, edge, center, or repeated placement suited to the risk.
Preview at final display size
Check both bright and dark areas and make sure the text does not cover essential detail.
Export a separate watermarked copy
Use a clear filename and retain the clean master for future authorized outputs.
Quality Details That Matter
Opacity is not the only control
Size, color, outline, position, and surrounding detail all affect visibility.
Anchors improve consistency
A repeatable corner or inset makes a photo set feel intentional.
Center marks are harder to crop
They are more intrusive and should match the actual sharing risk.
A watermark is not complete protection
Keep ownership records and publish only authorized copies.
Where Image Editor Fits
Edit, watermark, retouch, clean up, enhance, and restore photos in one Windows workspace.
Review the GiliSoft Image Editor product page or follow the Image Editor user guide for product-level instructions.
Troubleshooting and Review
- The mark disappears on bright areas: change color, outline, opacity, or position.
- The mark dominates the image: reduce size or opacity and protect the subject.
- Text changes between files: save and verify the approved wording.
- Resizing makes it unreadable: preview the actual delivery dimensions.
- The clean master is lost: separate source and watermarked export folders.
Rights, Privacy, and Source Protection
Edit only photos you own or are authorized to modify. Preserve original files, respect client scope and copyright, and review visible details, filenames, metadata, storage, and delivery when privacy matters.
Frequently Asked Questions
What text should a photo watermark contain?
Use concise, accurate wording such as an owner name, copyright notice, proof label, or approved usage statement.
How opaque should a watermark be?
Use the lowest opacity that remains reliably visible for the intended purpose and background.
Where should a text watermark be placed?
Corners are less intrusive; central or repeated marks resist cropping but cover more of the photo.
Does a watermark create copyright ownership?
No. Copyright protection and ownership records are separate from the visible mark.
Can I try the recommended software before buying?
Yes. Test GiliSoft Image Editor with representative photos, difficult edges, and required output settings.
Should I keep the original photo?
Yes. Preserve an untouched source and export edited results as separate files.