
Choose the Right Approach
| Situation | Practical approach | What to protect |
|---|---|---|
| Same orientation and dimensions | One consistent batch rule | Stable anchor, inset, and relative scale |
| Mixed portrait and landscape | Separate batches | Subject and corner space differ |
| Mixed resolutions | Use proportional sizing or groups | A fixed pixel logo becomes inconsistent |
| Client proofs | Visible repeated or central mark | Filename, identity, and review status |
Prepare the Photo Workflow
Make the source, authorization, output, and review decisions before changing pixels.
Separate portrait and landscape
Do not force one placement onto incompatible compositions.
Inspect resolution ranges
Group unusually small or large images separately.
Approve brand rules
Confirm text, logo asset, opacity, scale, and clear space.
How to Complete the Task on Windows
Work from a preserved source, make controlled changes, and judge the exported result rather than the editor preview alone.
Prepare the clean output-ready photos
Finish crop, orientation, resize, and essential adjustments before watermarking.
Group photos by compatible layout
Separate orientation, aspect ratio, dimensions, and exceptional subject placement.
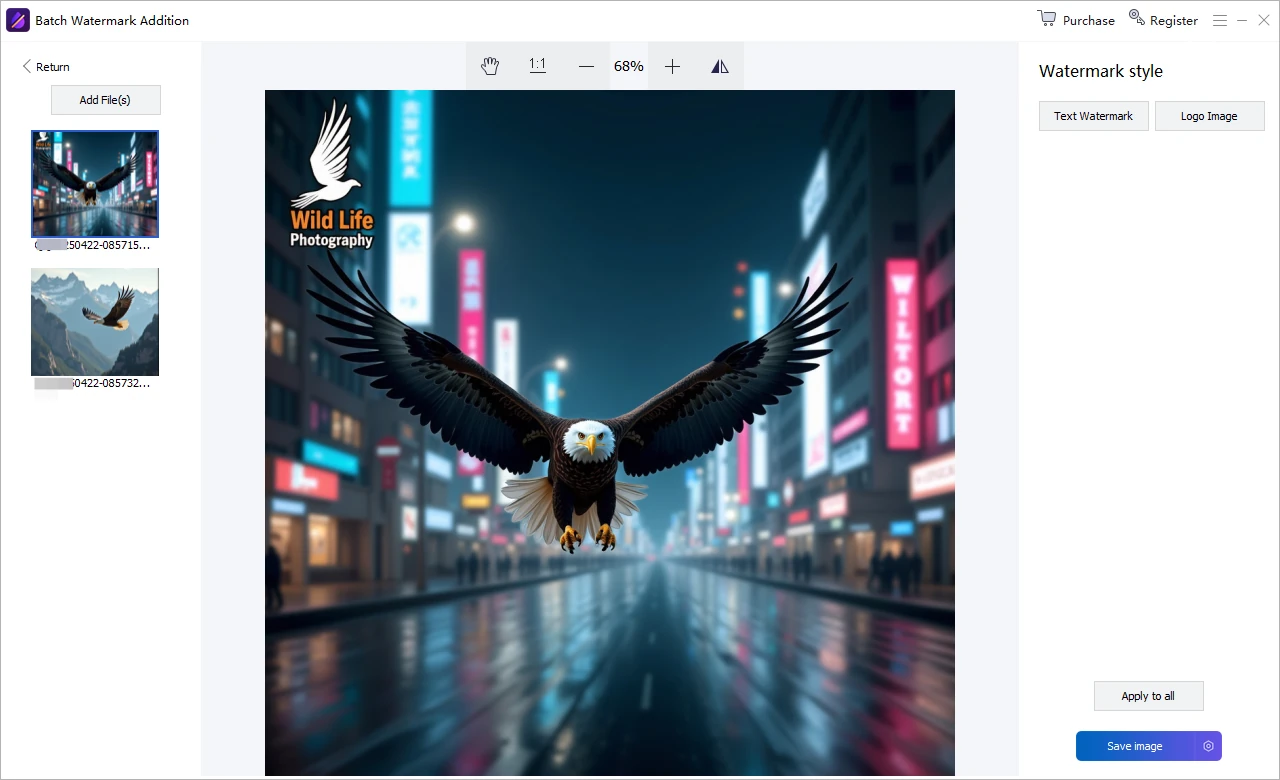
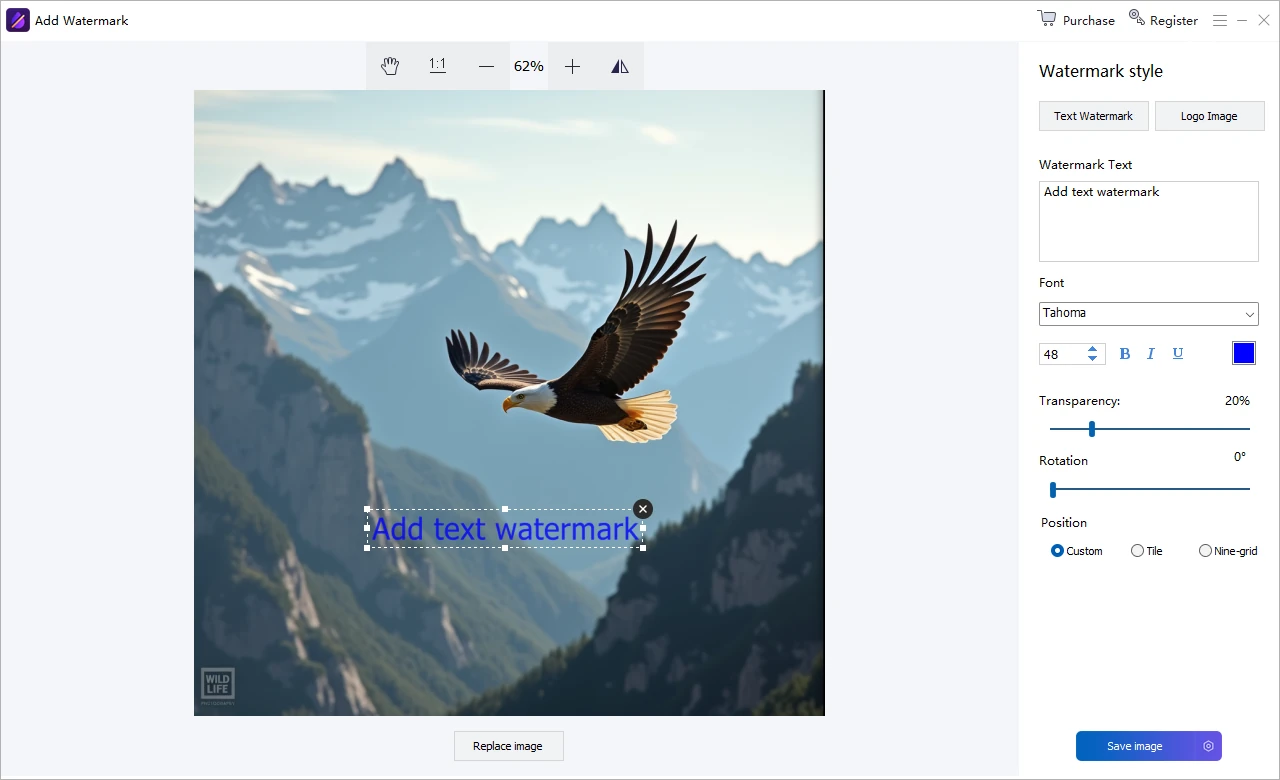
Create the text or logo watermark rule
Set approved content, proportional scale, opacity, anchor, and inset.
Run a representative test set
Include bright, dark, detailed, smallest, largest, portrait, and landscape examples.
Process each approved group
Write to a new folder with predictable names and enough free space.
Audit the batch outputs
Inspect edge cases and samples throughout the queue before delivery.
Quality Details That Matter
Group by composition
Orientation and subject placement matter as much as dimensions.
Use proportional rules
Relative scale and inset usually remain more consistent across resolutions.
Test contrast extremes
A mark can vanish on white or black regions.
Audit after processing
Completion status cannot confirm visual quality.
Where Image Editor Fits
Edit, watermark, retouch, clean up, enhance, and restore photos in one Windows workspace.
Review the GiliSoft Image Editor product page or follow the Image Editor user guide for product-level instructions.
Troubleshooting and Review
- Portrait images use the wrong corner: split orientation groups.
- Small files have oversized marks: create a separate size rule.
- A few subjects are covered: remove exceptions and watermark them individually.
- Output names collide: define a suffix and destination before processing.
- The wrong logo version appears: validate the source asset and test output.
Rights, Privacy, and Source Protection
Edit only photos you own or are authorized to modify. Preserve original files, respect client scope and copyright, and review visible details, filenames, metadata, storage, and delivery when privacy matters.
Frequently Asked Questions
Can one batch include portrait and landscape photos?
It can, but separate groups usually produce more consistent placement and avoid covering subjects.
Should watermark size be fixed in pixels?
Proportional sizing is often more consistent across different resolutions.
Can I batch add both text and logo marks?
Use the supported watermark layers and test the combined result on representative photos first.
Should batch output overwrite the source?
No. Preserve clean masters and write verified marked copies to a separate folder.
Can I try the recommended software before buying?
Yes. Test GiliSoft Image Editor with representative photos, difficult edges, and required output settings.
Should I keep the original photo?
Yes. Preserve an untouched source and export edited results as separate files.