
Know What the Disc Image Must Preserve
Quick answer: A disc image is useful only when its format matches the later workflow. Data-disc ISO images and audio-oriented image formats are not automatically interchangeable. Select an image type actually offered for the chosen GiliSoft task, keep any companion files together, and test the image by mounting or burning it with compatible software.
| Playback or workflow | Recommended output | Important check |
|---|---|---|
| Archive a data-style music disc | Available ISO image task | Confirm file and folder contents |
| Preserve an audio-oriented layout | Available BIN/APE image task | Keep required companion information together |
| Burn on another workstation | Format supported by destination software | Transfer and verify checksums or file size |
| Produce later copies | Tested image from approved project | Record disc type, date, and revision |
Before You Start
A successful burn begins with the destination player, compatible blank media, and a reviewed source list. Decide those details before the optical drive starts writing.
Define the later use
Archive, mount, transfer, or burn again are different requirements.
Finalize the project
Track order, edits, names, and disc type should be approved first.
Choose reliable storage
Keep enough space and use a descriptive filename plus a backup.
How to Create an Audio CD Image for Later Burning: Step by Step
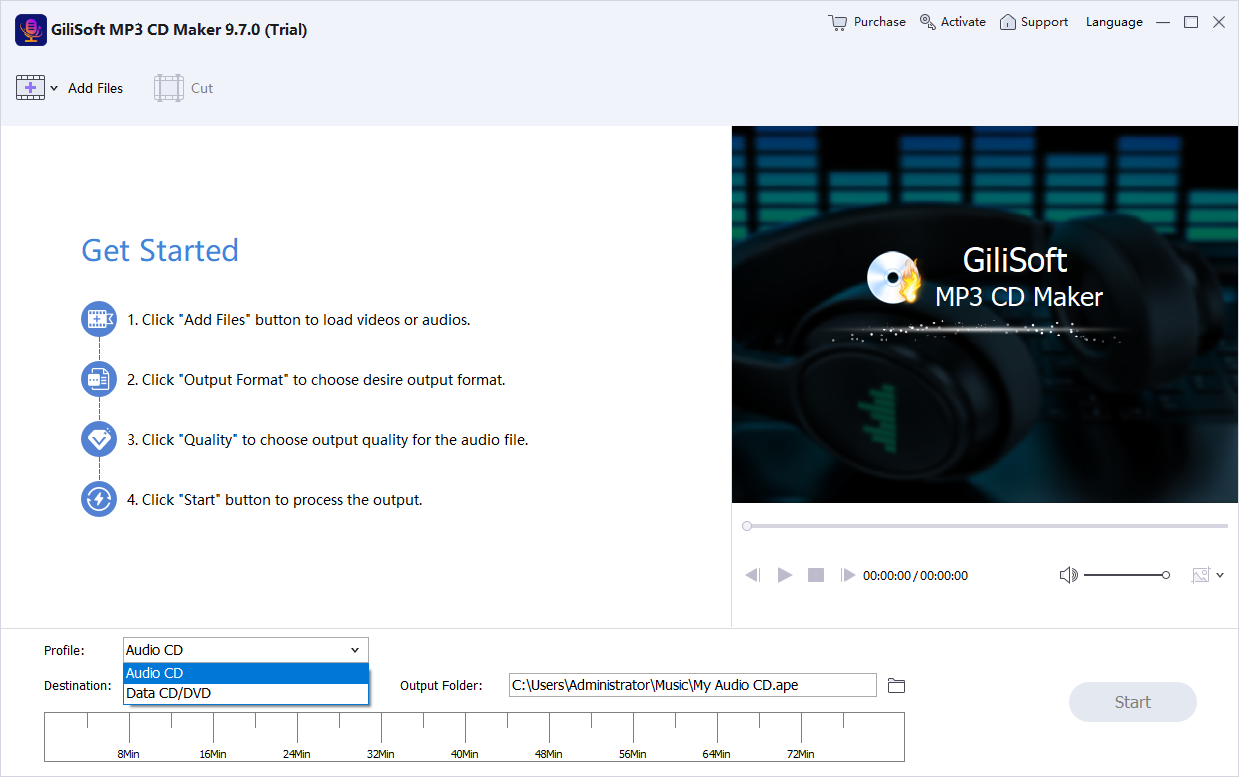
Choose the intended disc project
Start with Audio CD, MP3/WMA, or data content according to what the later physical disc must do.
Add and finalize source tracks
Arrange the approved order, remove unwanted files, and preview edits before creating the image.
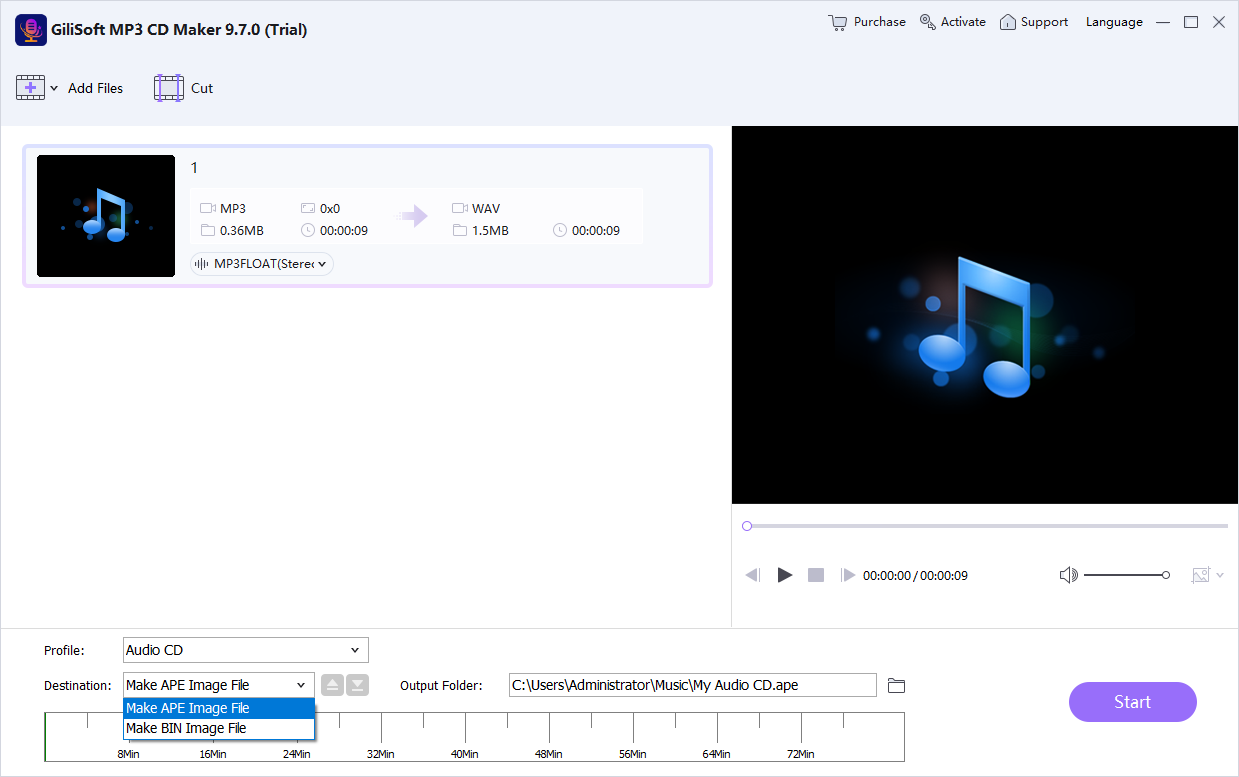
Open the available image-output task
Use the image format provided for that workflow rather than renaming a normal file or assuming every format behaves the same.
Choose the destination and filename
Store the image on a reliable drive with a project name, disc type, revision, and date.
Create and inspect the output
Wait for completion, confirm the expected files exist, and preserve any companion file required by the format.
Test the image before relying on it
Mount it where supported or burn one test disc, then check content and playback on the destination device.
Improve Disc Reliability and Playback Compatibility
Do not rename formats
Changing a filename extension does not convert a disc image or make it compatible.
Keep companion files
Some image layouts depend on more than one file; move and back them up together.
Record the intended disc type
The filename or manifest should say Audio CD, MP3/data disc, revision, and date.
Test restoration early
A backup is not proven until the image can be mounted or burned and the result checked.
Recommended Windows Tool: GiliSoft MP3 CD Maker
GiliSoft MP3 CD Maker offers supported ISO, BIN, and APE image creation as part of its music-disc workflow. Use the format shown for the selected task, then verify that the later mounting or burning software accepts it.
- Create standard Audio CDs or MP3/WMA music discs from the appropriate mode.
- Import common audio formats and selected video sources when their soundtrack is needed.
- Arrange, remove, trim, mix, or preview material before committing it to disc.
- Test a finished disc before making copies or distributing authorized content.
Troubleshoot Common CD Burning Problems
| Problem | Likely cause | What to do |
|---|---|---|
| Image will not mount | Format is unsupported by the mounting tool | Use compatible software or test by burning through the matching workflow |
| Image opens but audio layout is wrong | A data-style image was used for an Audio CD goal | Recreate the project with the correct disc and image task |
| Companion file is missing | Only one part of a multi-file image was copied | Recover or recreate the complete image set |
| Later burn produces an unreadable disc | Image, media, session, or player is incompatible | Test with known-good media and the destination player before batch use |
Burn Only Music You Are Authorized to Copy
Use your own recordings, public-domain material, or music for which you have suitable copying and distribution permission. Purchasing access or being able to play a stream does not necessarily grant the right to duplicate it, and technical protection should not be bypassed.
Frequently Asked Questions
Is an ISO always the best image format for an Audio CD?
No. ISO is widely used for data file systems, while audio-disc workflows may use other image structures. Use the format offered for the selected task and supported by the software that will burn or mount it.
Can I create an image without a blank disc?
Yes, when the software provides an image-output task. You still need enough storage and should verify the image before deleting source material.
Can a disc image replace my original music files?
It should not be the only copy. Keep the authorized source files and project information, especially when future editing or format changes may be needed.
Can I send the image to another computer?
Yes, if the destination has compatible software and enough storage. Transfer every required companion file and verify the received size or checksum.
What should I test after burning?
Test the first, middle, and final tracks on the actual destination player. Also confirm track order, navigation, silence between tracks, and that the disc starts after reinsertion.
Can I burn downloaded or streaming music to CD?
Only burn music you own or are authorized to copy. A playable source does not automatically grant duplication or distribution rights, and protected streams should not be bypassed.
More Audio CD and Music Disc Guides
Continue with the disc format, production method, or complete product guide that matches the next task.