
Quick Answer
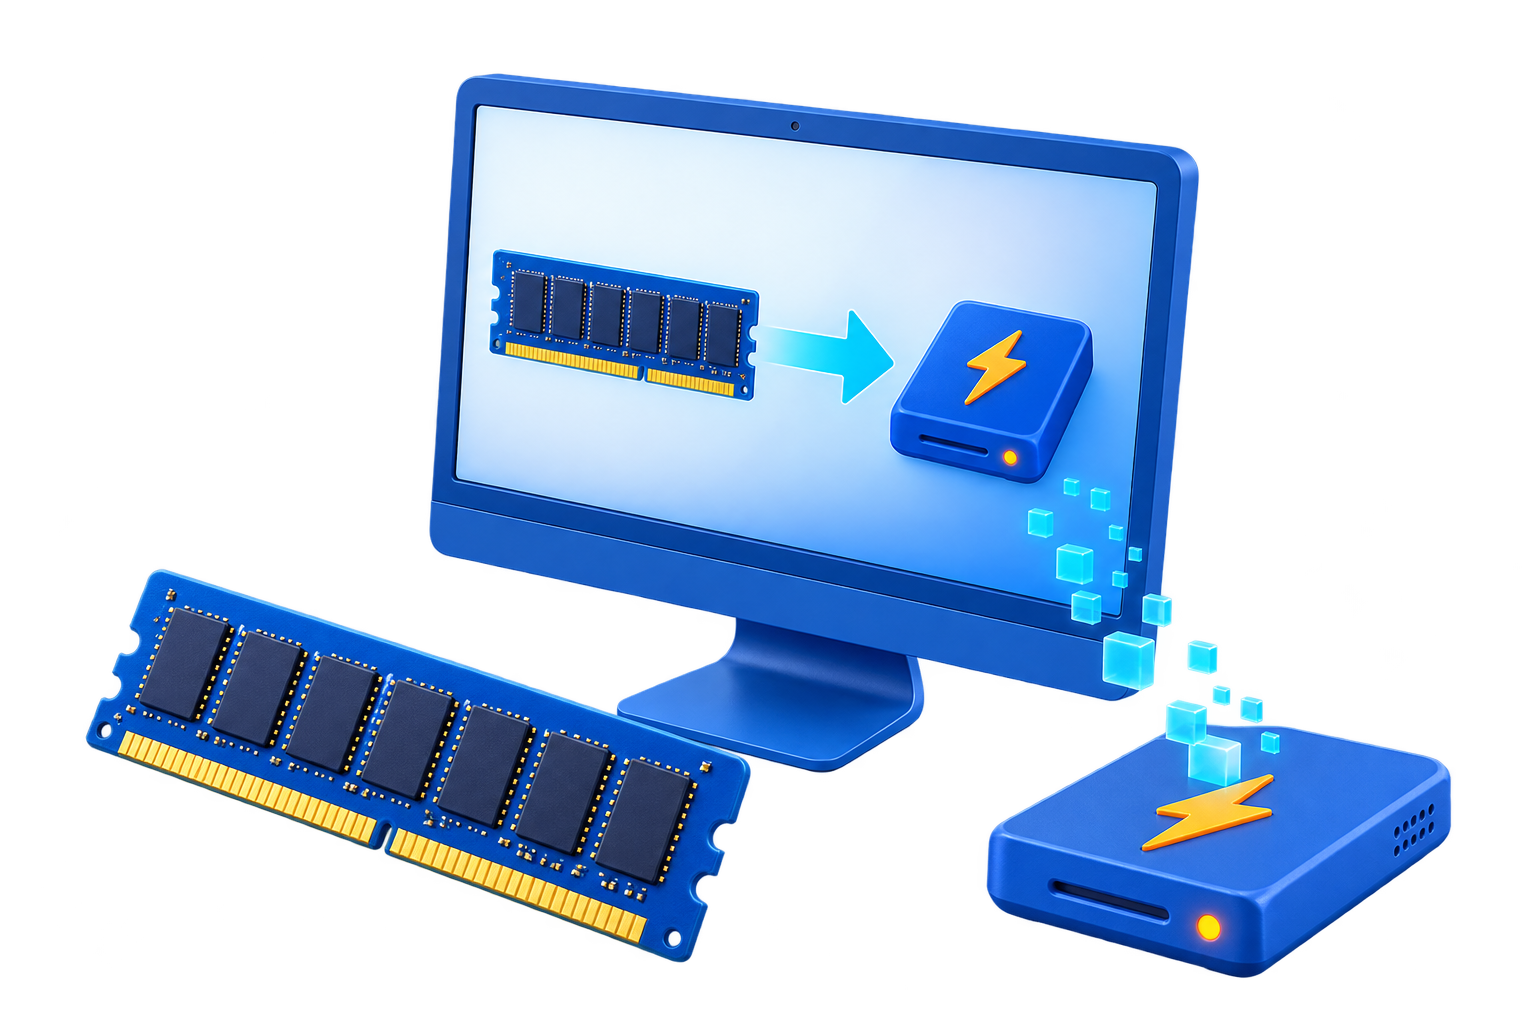
Use GiliSoft RAM Disk to turn available physical memory into a Windows drive. The basic workflow is:
- Create a RAM disk and choose its size, drive letter, and file system.
- Use an empty disk for disposable data or an image-backed disk when files must return.
- Configure automatic loading and saving for image-backed storage.
- Point only supported cache, scratch, build, or temporary paths to the RAM drive.
- Move important files elsewhere and close active applications before removing the disk.
Before you create a RAM disk
A RAM disk uses part of the computer's physical memory. Decide how much memory Windows and your normal applications need first, then use only the remaining capacity for the virtual drive.
Starts as an empty drive and is ideal for cache, temporary files, extracted files, build output, and other data that can be recreated.
Connects the memory drive to an image file so selected contents can be saved and loaded again after a restart or shutdown.
Do not allocate most of the installed RAM. Keep comfortable free memory for Windows, browsers, editors, development tools, and other active applications.
Select a drive letter that is not already used by a local disk, removable device, network share, or application path.
Use a temporary disk for disposable data. Use an image-backed disk only when selected contents need to return in a later session.
Do not keep the only copy of important documents, source media, or project files on an unsaved RAM disk.
1. Create a new RAM disk
Choose the drive size, letter, and file system
- Open GiliSoft RAM Disk and select Create a RAM Disk.
- Choose the option to create a new RAM disk.
- Select a drive letter that is currently free.
- Set a practical disk size while leaving enough memory for Windows and active programs.
- Choose the file system required by the files and applications that will use the drive.
- Continue to create and mount the drive.
After creation, Windows treats the RAM disk like an ordinary drive, but its storage is supplied by system memory.
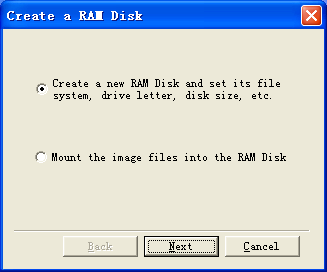 Start a new RAM disk and configure its storage settings
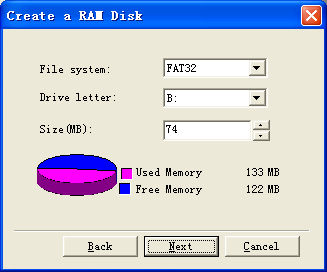 Choose the drive size, letter, and file system
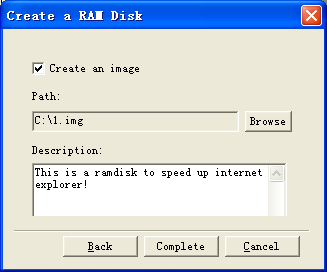 Review the configuration before mounting the drive
2. Decide whether the RAM disk should be temporary or persistent
Use an image only when the data needs to return
- Choose an empty RAM disk for browser cache, temporary folders, preview cache, build output, and disposable working files.
- Enable Create an image when the disk contents should be saved outside memory.
- Select a location on a normal SSD or hard drive for the image file.
- Add a clear description so the image can be identified later.
- Choose an automatic save policy if the image should stay current.
 Choose how RAM disk contents are saved and restored
3. Load an existing RAM disk image
Mount previously saved contents as a Windows drive
- Open GiliSoft RAM Disk.
- Select Mount an image file.
- Browse to the RAM disk image stored on a normal drive.
- Select the desired drive letter when prompted.
- Mount the image and wait for the RAM drive to appear.
- Open the mounted drive and verify the expected folders and files.
Keep the source image on permanent storage. The mounted drive works in memory while the image provides the saved starting contents.
 Load a saved image and mount it as a RAM-backed drive
4. Configure automatic loading and saving
Choose a save policy that matches the value and update frequency of the files kept on the image-backed disk.
Mount the most recently used RAM disk image automatically after Windows starts.
Write current RAM disk changes to the image when Windows restarts or shuts down normally.
Update the image when the computer enters a suspended state.
Use periodic saves when the image changes during a longer work session.
Keep the image synchronized more frequently when current contents matter more than minimizing disk writes.
Create a secondary image copy before updating the main file, helping preserve an earlier recoverable state.
 Configure automatic image loading and save behavior
 Configure an empty RAM disk to return after Windows restarts
5. Use the RAM disk for suitable temporary work
Point cache or temporary paths to the mounted drive
- Open the mounted RAM disk in Windows Explorer.
- Create clearly named folders such as BrowserCache, Temp, Build, or PreviewCache.
- Open the application whose temporary location you want to change.
- Change only its cache, scratch, build, or temporary-output path to the RAM drive.
- Restart the application if required.
- Confirm that new temporary files appear in the expected RAM disk folder.
The exact cache setting varies by browser and application version. Change temporary paths only when the application provides a supported setting or documented startup option.
 Open the mounted drive and create folders for cache or temporary work
Useful for frequently rewritten cache files that can be recreated by the browser.
Useful for compiler output, repeated test artifacts, and disposable development folders.
Useful for temporary previews, render cache, proxies, and other recreatable editing data.
Useful for short-lived extracted files and intermediate data that should not remain on the main drive.
6. Remove a RAM disk safely
Close active files and decide whether to save the contents
- Close applications that are using files or cache folders on the RAM disk.
- Move any files that must be kept to permanent storage.
- Select the RAM disk in GiliSoft RAM Disk.
- Choose the remove command.
- When asked whether to save the contents to an image, choose Yes only when those contents are needed later.
- Confirm that the drive disappears and its allocated memory returns to Windows.
 Remove the drive and decide whether its contents should be saved
Final RAM disk checklist
RAM Disk troubleshooting and FAQ
How much memory should I assign?
There is no universal size. Leave enough memory for Windows and your normal applications first, then allocate only comfortable spare capacity to the RAM disk.
Why did my files disappear after restarting?
The drive was probably created without an image, or its recent changes were not saved to the image before shutdown.
Why does the RAM disk not return after startup?
Check whether automatic creation or automatic image loading is enabled, and confirm that the image path is still available.
Can I use a RAM disk for browser cache?
Yes. Create a cache folder on the RAM drive, then use the browser's supported cache setting or documented startup option to point cache activity there.
Can I store important files on it?
Use permanent storage for important originals. If selected RAM disk contents must persist, use an image-backed disk with an appropriate save and backup policy.
Does a RAM disk replace an SSD?
No. It is a focused workspace for temporary, frequently rewritten, or easily recreated data, not a replacement for long-term storage.
RAM Disk Help by Task
Choose the browser, application, or temporary-storage workflow you need. Detailed scenario pages live here so the product page remains focused on GiliSoft RAM Disk itself.


